Several months ago my friend, Desiree, and I decided that we were going to put some things together and open up an Etsy shop together. We both love to make all kinds of craft projects and especially love fun accessories.
And so was born... DesiLea Boutique. Our grand opening is tomorrow, February 1st and I'm really excited to get things going! Fingers crossed that it is successful and continues to be a fun project for the both of us.
Anyway, I just decided that in honor of our grand opening... I'm going to have a giveaway. The details are being nailed down still... but check back here for more details. Or, be updated automatically when you "like" us on Facebook! Just check out the new box in the sidebar and like DesiLea Boutique!
Ooh... this is going to be fun! More details to come soon!
Monday, January 31, 2011
Sunday, January 30, 2011
Valentines PJ Pants
I've been wanting to make some pajama pants for the girls for awhile now. I had big plans to make some for Christmas but ran out of time... so Valentine's Day PJ's it is!
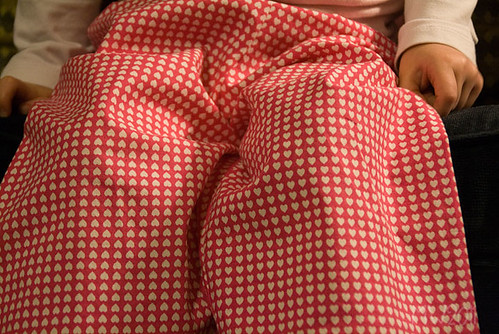
I stopped at the fabric store on my way home from work one evening and unfortunately there were some major slim pickings when it came to the Valentines holiday fabric. Fortunately... I found ONE that I liked. I was really hoping for two that coordinated but that wasn't happening... so this time I just had to make both pairs the exact same.
I'm not too big into making the girls stuff that matches exactly. It's pretty rare that I dress them the same... although I do like when they coordinate :)
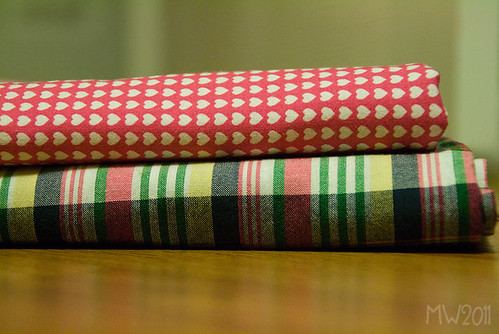
Anyway, here's the fabric that I came home with... the madras plaid is for a future project (I'm not 100% sure what it will be just yet... but I'm making something with it :))
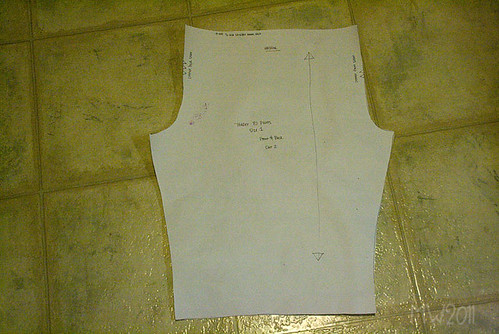
I spent one evening washing and pressing the fabric to have it prepped to start working with. I also traced my pattern on to a large sheet of paper. Why? Well... the pattern I used had sizes 1/2 to 4... my kids wear the size 1 and I figure I'll make plenty of these pants over the years. No need to waste my pattern and cut the thin little pattern paper. If you trace the pattern to a more sturdy sheet of paper then you can re-use it over and over.
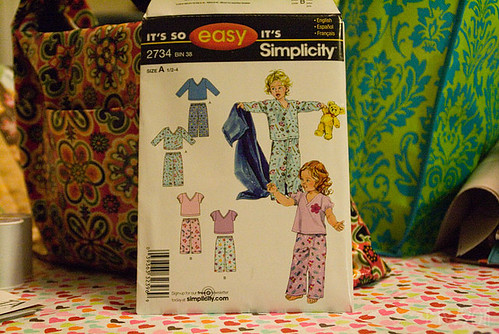
Oh yeah, the pattern... if you are curious, I used this Simplicity 2734. It says "It's So Easy" and it really is... These were super simple to make... just as I had hoped!
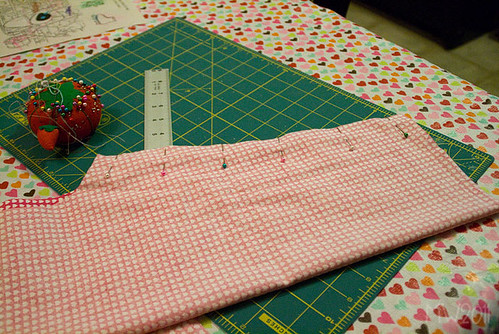
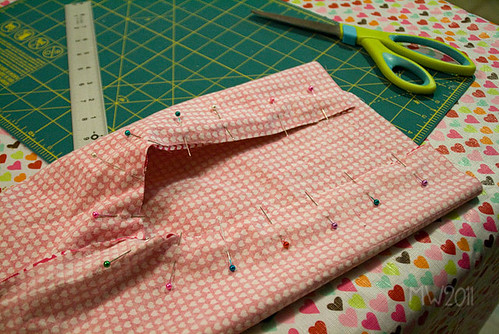
I began by cutting my pieces out then sewing the inner leg seams together.
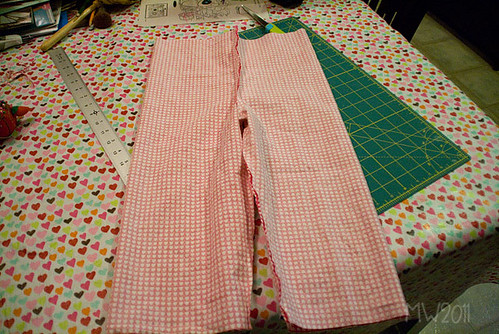
Then I slid one leg inside the other and stitched the crotch pieces together.
That's it... there are only 2 real seams on these pants! How simple is that?
All that is left now is to put in the waistband and then hem the pants. Sorry... no pics of that - it's pretty boring and basic, you understand :)
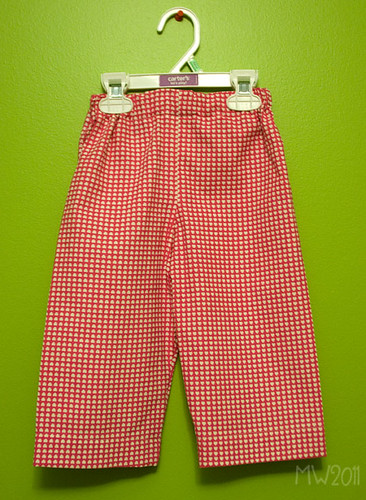
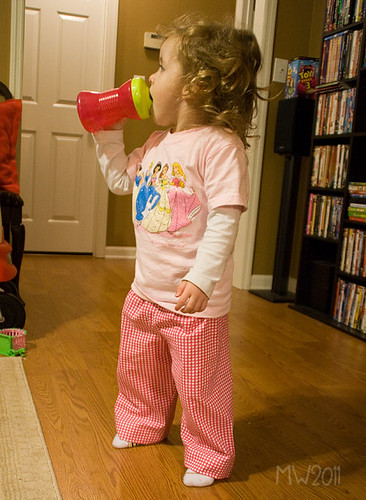
And here they are!
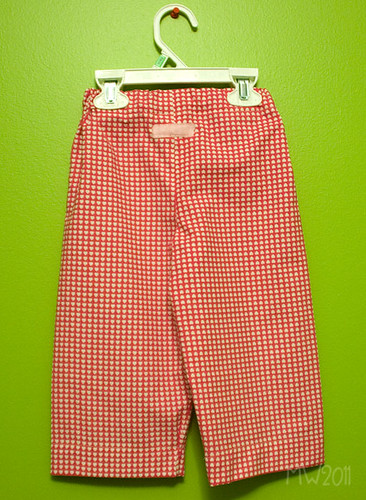
I added a little tab of felt ribbon on the back side as a little detail and to also let me know which side was the back.
That's it! Cute huh? My little model was a bit too busy to be bothered by Mom wanting to take her picture... her eyes glued to Toy Story, of course :)
I actually made it through a project without any major issues... only one visible flaw too... have you seen it yet?
How about now?
Oh well... this was the result of my fabric being folded weird when I cut the pattern pieces out. I say it just adds a bit of character :) hehe
Linked up today's post to:


itching to go to the thrift store...
I've really been enjoying this blog lately. Not only does Danielle have some really awesome ideas and great taste (she's the one doing the headband swap that I am participating in), but she's super cute and kind of reminds me of my childhood friend, Erin.
Anyway, so I was browsing through my Reader list today and saw her post "thrifted" ...all I can think about now is how I really want to go check out some thrift stores to see what awesome finds I can find :) Thanks Danielle...
Oh if only I had more time... and space to put this stuff :)
Anyway, so I was browsing through my Reader list today and saw her post "thrifted" ...all I can think about now is how I really want to go check out some thrift stores to see what awesome finds I can find :) Thanks Danielle...
Oh if only I had more time... and space to put this stuff :)
Tuesday, January 25, 2011
Valentine Wreath
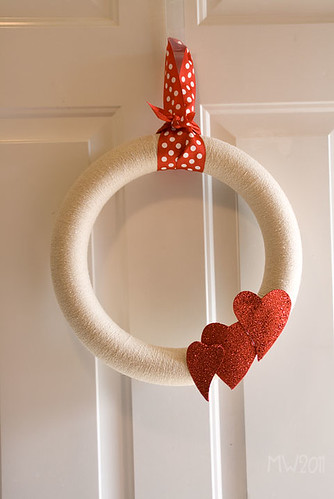
I finally got around to making my new wreath for my door... and taking down the Christmas one!
I've been planning this for awhile, but finally was able to get it all finished.
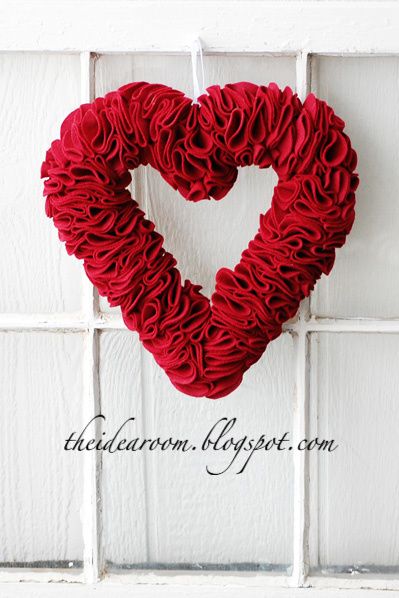
I had seen tons of great wreaths that I had liked and wanted to make. And then decided to get the supplies for this beauty that I found at The Idea Room.
I made a trip to Hobby Lobby on a lunch break and wasn't too wild about the size of the heart shaped wreath forms that they had. I wanted a bigger one. So I settled on a round wreath form instead. I started cutting my felt circles, and then stopped there. Why? Well, I still wanted the heart shaped wreath. No one else in town had any forms so I abandoned the idea and started looking for new ideas.
My friend Desiree over at Chic Inspirations had decided to make the heart wreath with a little different twist to use on the doors at the church for her wedding... they turned out really cute.
I came across one like this. This isn't the original site I found the idea on... but I can't locate it anymore right now - same concept though. When I saw the yarn wrapped wreath I thought that I might be able to make it neutral, and then just be able to change out the embellishments for different seasons/holidays. Always a good thing when you are short on storage space, right?
So, I had some neutral yarn and wrapped it around my styrofoam wreath form. There were some odd spots where it didn't wrap just right, so I figured I'd use those spots as a place to wrap my ribbon door hanger, and the place to add my embellishments.
I found a pick of glittered hearts at Hobby Lobby that I thought would be perfect! So, I just gut them off the pick with wire cutters, and used my new toy to glue them to the wreath. :)
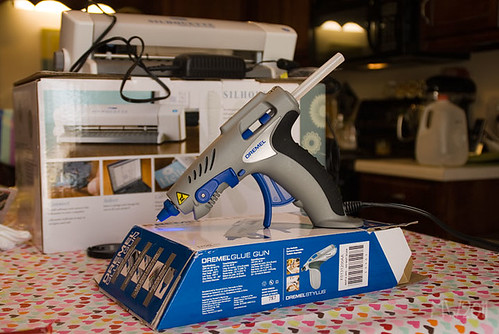
My new toy is this awesome bad boy right here...
it's a Dremel Hot Glue Gun and has interchangeable tips for more precise gluing (without all the excess glue everywhere that just isn't pretty). It's got different temperature settings and a neat little stand built in. Yep, pretty awesome.
Oh, and you can see my Silhouette in the background that I dug out of storage from the garage. I've had it about 2 years now, but haven't really done much with it. I've seen tons of awesome projects lately using it, so I dug it back out and will be playing with it soon... so check back to see what I do!

Labels:
handmade,
holiday,
home decor,
Valentine's Day,
wreath,
yarn
Monday, January 24, 2011
my baby fresh couch
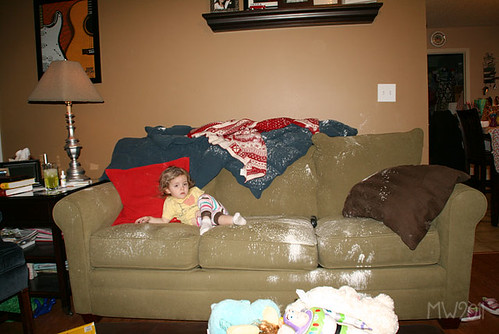
This is what happens when you leave your toddler alone to watch her movie (dad was washing dishes right around the corner) and there is a powder bottle in her reach :)
On the bright side... my couch smells baby powder fresh!
headband almost complete!
I'm glad I decided to also make a headband for this headband swap in addition to the one I purchased... because, well... I'm afraid that the one I bought on Etsy won't make it here in time. We are supposed to mail our headbands out by next Monday 1/31 - so there is still time. But just in case... I at least have a back up plan.
The only reason I'm a little worried is that the shop that I've been stalking for awhile that I mentioned was closed and empty - started stocking their stuff up again, and I didn't see the notice still on their front page about them being closed still (or maybe they aren't closed still, but jut forgot to remove the notice) I don't know. Anyway, I bought 2 headbands from them (one for my lovely partner and one for myself) and well... that's it. Here's hoping they get here in time... if not, I'll just send along my lovely headband by the deadline and just send along the other when it gets here.
Don't worry there though swap partner... the one I made is super cute, and totally not covered in hot glue (as warned by Danielle) :) I hope you'll like it... I totally do!
finally tried vinyl
So... everyone has been doing all this super awesome stuff with vinyl and their Silhouette machine. I have a Silhouette that has been boxed up for the past 2 years in the garage. Why? Well, I have the original Silhouette and originally, the software was only for Windows machines. I have a Mac. So, I used it a few times using my old laptop then got annoyed at not having a place to be able to set everything up... and having to design things on one machine then take the files to another to cut it all up. So... it got boxed up.
Well, with all the hype about Silhouette machines lately... I discovered that they had updated the software and it would work with my Mac now! Yeah!
Anyway, like I said... there have been tons of awesome vinyl projects out there lately and I really wanted to try it out on my machine. So I stopped at Hobby Lobby last week and got a roll of vinyl using my 40% off coupon :) Yeah! That meant I paid about $4.99 for a 10 foot roll :)
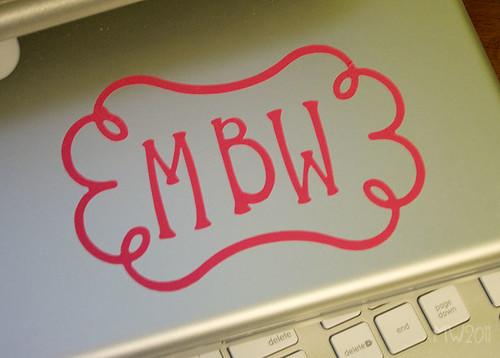
I finally got around to figuring out what I wanted to cut... and had at it.
Awesome huh? A new vinyl label for my laptop. Not that I need to tell it apart from anyone else as it rarely leaves my house... but it's pretty. And was the perfect starter vinyl project :)
I now want to do something really cool on my Kitchenaid mixer like this... by Sophie at Sophie Gallo Design
Maybe even something cool on my sewing machine :)
One thing I did notice was that it took forever to cut this simple design. My machine kept "thinking" in between cuts. Not sure if that is normal, or what the deal was... but eventually it worked out ok. Has anyone else had this problem??
Sunday, January 23, 2011
Blog Makeover
I finally had enough of the plain old, out of the box look of my blog. I've actually been looking for ideas for several weeks now, but finally had a chance to sit down and get some work done on it. What do you think?
Probably the biggest change is that I now have a pretty header. It's not exactly what I was originally wanting, but this will do until I have time to draw up something more along the lines of what I was wanting. I like the colors though. It's something bright and pretty to look at... which is nice when its so cold and dreary outside right now. :)
I also added the Linkwithin widget which allows you to link up thumbnails of other relative posts. I had seen this on several other blogs that I visit and really like how it helps me find other stuff that I might not have seen otherwise. I hope you like it too!
Who knows how long this will last... I plan to test it out for a little while before I go trying to customize it anymore with custom fonts, buttons, etc. I do plan on getting all of those done eventually though.
Tell me what you think about the makeover :)
Project 52: Week 3
My week 3:
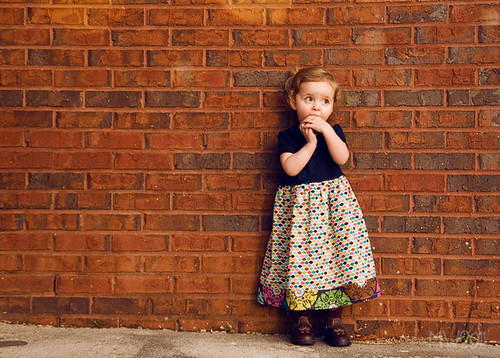
I was off work for the day for Martin Luther King Jr. Day... SQ had gone over to Grandma's house for a sleepover and so NK and I decided to play with the camera :)
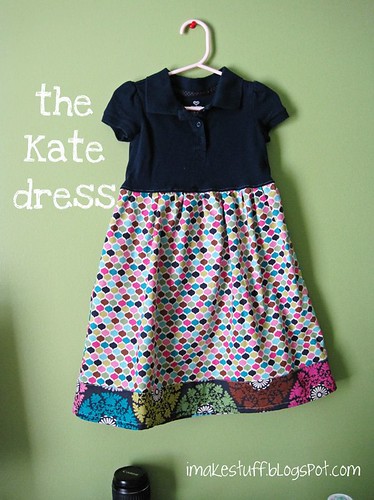
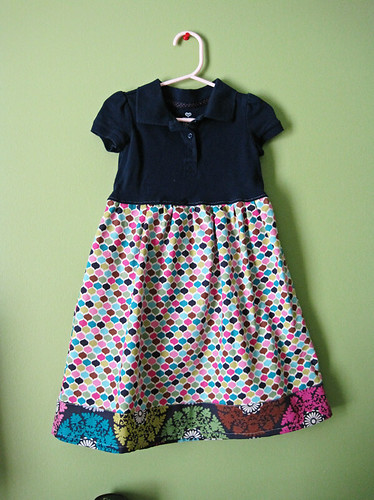
This is the "Kate" Dress that I made for her... had to get a few photos of her modeling it. She loved the dress... didn't want to take it off. Didn't want to take off the too small cowboy boots either :) Too cute!
Wednesday, January 19, 2011
the "Kate" dress
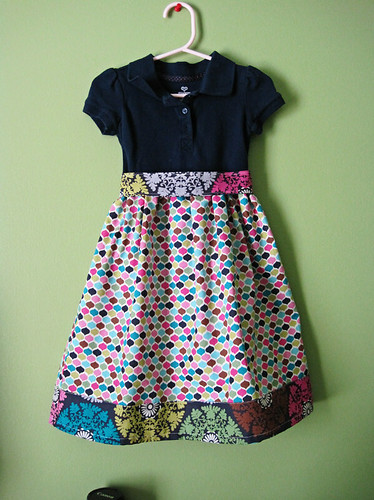
I have seen tons of tutorials all over the internet showing how to attach a skirt to a shirt and make a dress. I've seen tutorials for girls of all ages and had been wanting to finally make one myself. Today, I finally did! I didn't follow any specific tutorial that was out there, just kind of made it up as I went along... so I figured I'd share my own tutorial on what I did. And just for fun, I'm going to call this the "Kate" dress - just cause it's fun to name stuff :)
Supplies:
The shirt you choose should fit your child, at least in the head/arms/chest area. This is a great project for tops that are stained on the lower half or are a little short for normal wear. Ours fell into the category of simply being too short.
Step 2: Measure and Cut
Figure out where you want the skirt to begin, and mark it. Add a half inch to this mark (for seam allowance) and cut the bottom of the shirt off. Since the shirt I chose was a polo shirt, I made mine fall about 2 inches below the bottom button. In retrospect, I should have made it closer... maybe just one inch below.
Step 3: Measure some More
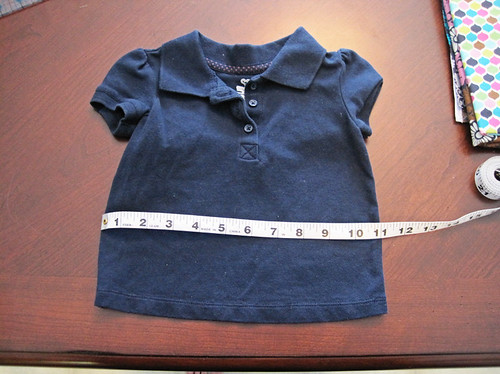
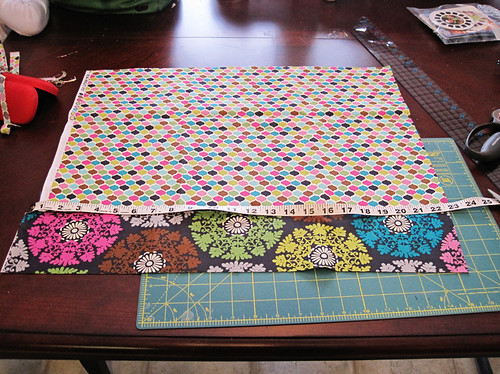
Lay your shirt out flat and measure across the bottom. Mine was 11". Take this measurement and multiply it by 2. This is the width that your skirt fabric should be. Now, figure out low long you want the dress to be, then add an inch for seam allowances - subtract the width of the band for the bottom (in Step 5). It's easiest to measure the person who will wear it... but if they are unavailable, then you'll have to just wing it. I measured, but still somehow mine turned out way longer than I intended.
Step 4: Cut your skirt using the measurements from the step above. You'll need two pieces - one for the front, one for the back.
Step 5: Cut the piece for the bottom band.
Decide how wide you want your bottom band to be, then cut a strip of fabric the same width of the skirt piece but the height that you want it to be plus 1 inch. You need two pieces, just like you did for the skirt.
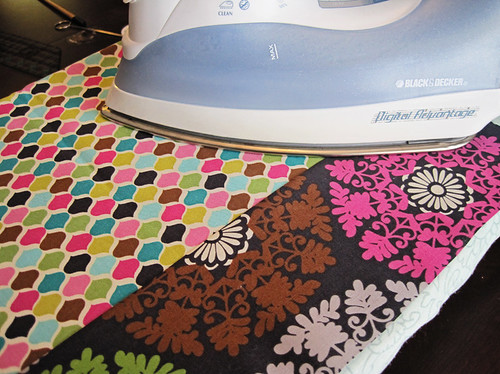
Step 6: Sew the band to the skirt. Make sure right sides are together. Press.
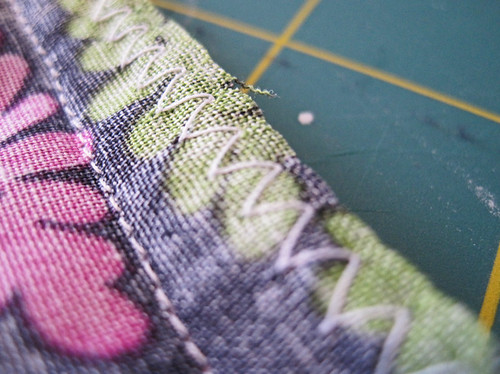
** I like to zig zag stitch the raw edges together (or serge it if you have a serger). It makes for a more professional look and is more durable as well.
Step 7: Sew the gathering stitch at the top of the skirt.
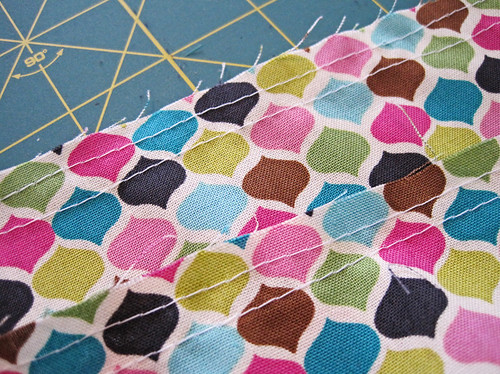
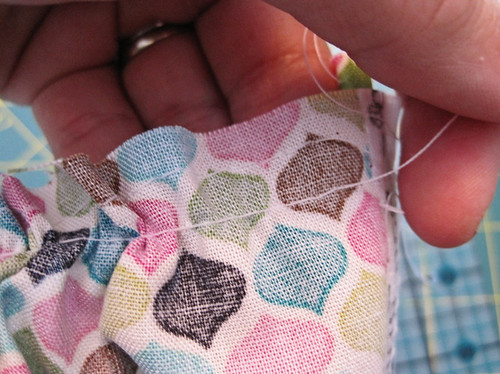
At the top of each skirt piece, make your gathering stitches - I like to make 2... one at 1/2 inch and one at 1/4 inch. I'm not completely sure what the purpose of this is, but I've seen it lots other places. It does always help me if I break one of the strings while I am gathering then I still have another to work with so that I don't have to start over.
Oh, and for a gathering stitch... you just need a really loose straight stitch with no backstitching at the ends. This way you can pull the thread at the ends and gather your stitching. I've also seen people make their tension on their machine really tight, and the stitch really loose and the machine can gather it automatically for you. This has never worked for me... but try it if you'd like.
Step 8: Sew your skirt together
Place your front and back skirt pieces right sides together. Stitch up the side seams making sure that your bottom border pieces match up evenly. Zig Zag or serge the raw edges and press flat.
Step 9: Hem the skirt
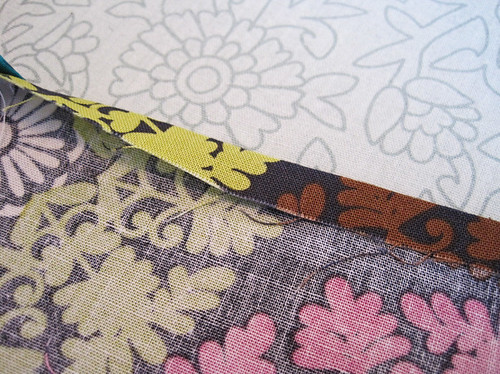
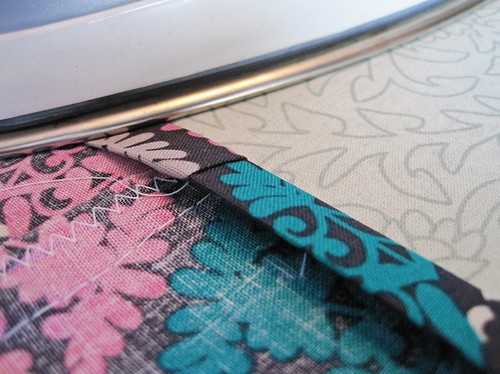
Go ahead and hem the bottom of your skirt at this point. I like to fold the edge over 1/4" and press, then fold over again and press, then stitch.
Step 9: Gather your stitches
I like to go ahead and gather my stitches as tight as they will go... or at least pretty closely (be careful to not break your strings though). If you gather it much smaller than you know it should be then you can always spread out your stitches to the actual width a little easier and spread them out evenly.
Step 10: Pin your skirt to your shirt
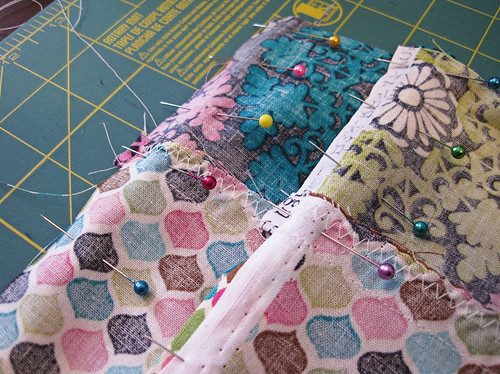
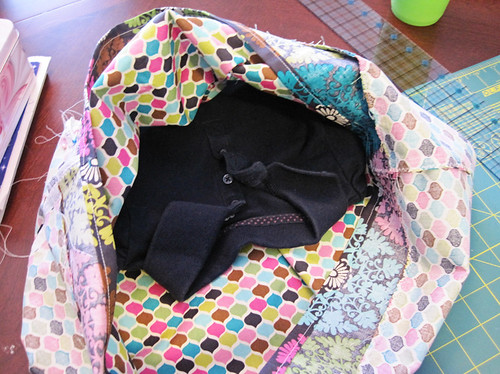
To start, you should make sure that your right side of your shirt and the right side of your skirt are facing each other. Slide the shirt inside your skirt (right sides facing) and line up the edges. I like to start pinning at the side seams.
Step 11: Stitch your skirt to your shirt.
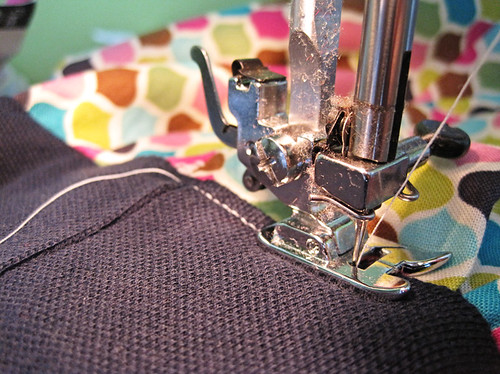
Stitch your top ans skirt together and then Zig Zag the raw edges and press flat.
Step 12: See what you've got!
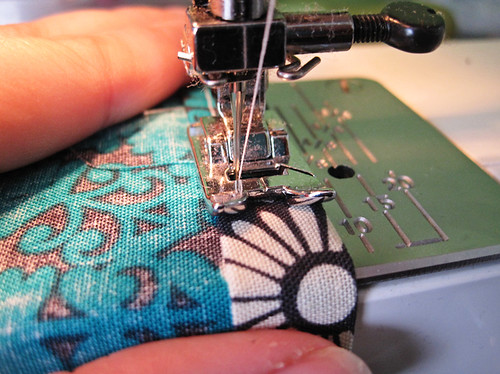
Turn your dress right side out and see how far you've come! Looks great doesn't it? Now, you can leave it as is and have a perfectly beautiful dress... but why stop here??
Optional:
Step 13: Do a little topstitching...
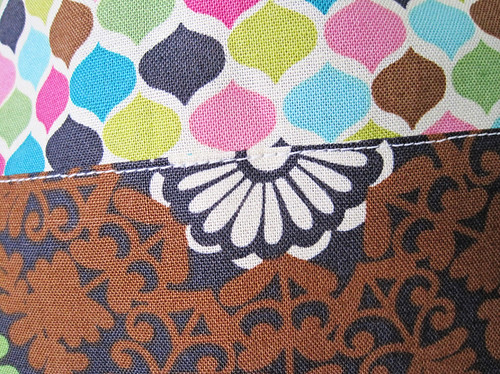
With your dress turned right side out, top stitch around where the skirt and shirt meet, also top stitch on the band. The top stitching gives it more of a professional look, and also helps reinforce your seams a bit.
Step 14: If you want, add a little belt/tie
I thought it would be cute to add a little belt to this... my daughter had other ideas and didn't want to wear it. If you'd like one... choose your fabric (I made mine the same width as the original skirt pieces 22") YOu'll need one piece twice the height that you want the finished belt to be... mine was 1" tall so I cut it 2".
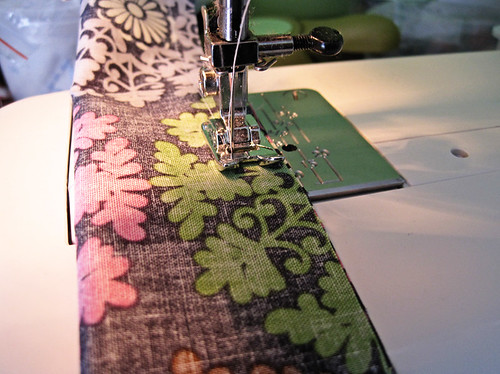
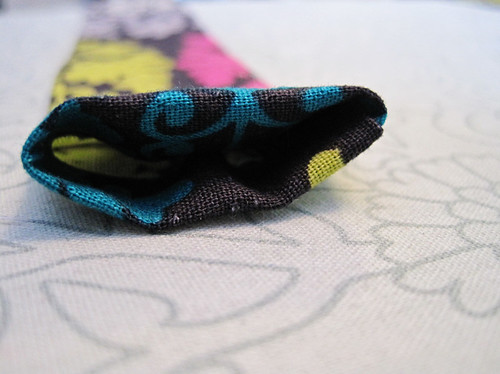
Fold and press the fabric in half (right sides together) then stitch around the open edges - leave the ends open for turning.
then Top stitch.
Ta-Da! You are done... now go find your favorite little girl and try it on!
I had a feeling that mine was a little long... and when I tried it on NK, it fit - but was definitely on the long side. I wanted to fix it, but she had other ideas. Apparently the dress was a hit because she didn't want to take it off. She wore it all day long :)
She even let me take her picture :) It's pretty rare that she'll allow me to take her picture anymore, so this was great!
Anyway... hope you enjoyed my little tutorial. I hope this was helpful! If you have any questions, please ask in the comments section. If you make one... I'd love to see it!

Supplies:
- Shirt
- Fabric for the skirt
- coordinating fabric for the band at the bottom and the optional belt/tie
- sewing machine
- matching or coordinating thread
- scissors
- measuring tape
The shirt you choose should fit your child, at least in the head/arms/chest area. This is a great project for tops that are stained on the lower half or are a little short for normal wear. Ours fell into the category of simply being too short.
Step 2: Measure and Cut
Figure out where you want the skirt to begin, and mark it. Add a half inch to this mark (for seam allowance) and cut the bottom of the shirt off. Since the shirt I chose was a polo shirt, I made mine fall about 2 inches below the bottom button. In retrospect, I should have made it closer... maybe just one inch below.
Step 3: Measure some More
Lay your shirt out flat and measure across the bottom. Mine was 11". Take this measurement and multiply it by 2. This is the width that your skirt fabric should be. Now, figure out low long you want the dress to be, then add an inch for seam allowances - subtract the width of the band for the bottom (in Step 5). It's easiest to measure the person who will wear it... but if they are unavailable, then you'll have to just wing it. I measured, but still somehow mine turned out way longer than I intended.
Step 4: Cut your skirt using the measurements from the step above. You'll need two pieces - one for the front, one for the back.
Step 5: Cut the piece for the bottom band.
Decide how wide you want your bottom band to be, then cut a strip of fabric the same width of the skirt piece but the height that you want it to be plus 1 inch. You need two pieces, just like you did for the skirt.
Step 6: Sew the band to the skirt. Make sure right sides are together. Press.
** I like to zig zag stitch the raw edges together (or serge it if you have a serger). It makes for a more professional look and is more durable as well.
Step 7: Sew the gathering stitch at the top of the skirt.
At the top of each skirt piece, make your gathering stitches - I like to make 2... one at 1/2 inch and one at 1/4 inch. I'm not completely sure what the purpose of this is, but I've seen it lots other places. It does always help me if I break one of the strings while I am gathering then I still have another to work with so that I don't have to start over.
Oh, and for a gathering stitch... you just need a really loose straight stitch with no backstitching at the ends. This way you can pull the thread at the ends and gather your stitching. I've also seen people make their tension on their machine really tight, and the stitch really loose and the machine can gather it automatically for you. This has never worked for me... but try it if you'd like.
Step 8: Sew your skirt together
Place your front and back skirt pieces right sides together. Stitch up the side seams making sure that your bottom border pieces match up evenly. Zig Zag or serge the raw edges and press flat.
Step 9: Hem the skirt
Go ahead and hem the bottom of your skirt at this point. I like to fold the edge over 1/4" and press, then fold over again and press, then stitch.
Step 9: Gather your stitches
I like to go ahead and gather my stitches as tight as they will go... or at least pretty closely (be careful to not break your strings though). If you gather it much smaller than you know it should be then you can always spread out your stitches to the actual width a little easier and spread them out evenly.
Step 10: Pin your skirt to your shirt
To start, you should make sure that your right side of your shirt and the right side of your skirt are facing each other. Slide the shirt inside your skirt (right sides facing) and line up the edges. I like to start pinning at the side seams.
Step 11: Stitch your skirt to your shirt.
Stitch your top ans skirt together and then Zig Zag the raw edges and press flat.
Step 12: See what you've got!
Turn your dress right side out and see how far you've come! Looks great doesn't it? Now, you can leave it as is and have a perfectly beautiful dress... but why stop here??
Optional:
Step 13: Do a little topstitching...
With your dress turned right side out, top stitch around where the skirt and shirt meet, also top stitch on the band. The top stitching gives it more of a professional look, and also helps reinforce your seams a bit.
Step 14: If you want, add a little belt/tie
I thought it would be cute to add a little belt to this... my daughter had other ideas and didn't want to wear it. If you'd like one... choose your fabric (I made mine the same width as the original skirt pieces 22") YOu'll need one piece twice the height that you want the finished belt to be... mine was 1" tall so I cut it 2".
Fold and press the fabric in half (right sides together) then stitch around the open edges - leave the ends open for turning.
then Top stitch.
Ta-Da! You are done... now go find your favorite little girl and try it on!
I had a feeling that mine was a little long... and when I tried it on NK, it fit - but was definitely on the long side. I wanted to fix it, but she had other ideas. Apparently the dress was a hit because she didn't want to take it off. She wore it all day long :)
She even let me take her picture :) It's pretty rare that she'll allow me to take her picture anymore, so this was great!
Anyway... hope you enjoyed my little tutorial. I hope this was helpful! If you have any questions, please ask in the comments section. If you make one... I'd love to see it!

Labels:
clothing,
dress,
fabric,
free pattern,
girls,
handmade,
kids,
repurposed,
sewing,
toddler,
tutorial
Ugh... I hate a sore throat!
I'm home today with an awful sore throat. It sucks. I'm trying to make the best of it though... Grandma took the girls over to her house so it's pretty quiet around here. I have been able to take some medicine and go back to bed, so that's been nice.
But now I'm awake and thought I'd take the opportunity to do a little looking for an awesome headband. Why? Well you see... I recently came across this post over at Take Heart about a headband swap. What a great idea!! So I signed up... and this morning when I checked my email I had all my details for my swap partner. Now, it's time to shop!
I don't know if it's all supposed to be secret or anything so I won't tell you who my swap partner is, but after checking out her blog I think she seems like a pretty cool lady. I hope I can find something she'll enjoy. I certainly like her favorite colors of: yellow, aqua or sea glass, brown, and pink.
I'll be honest, when I first signed up for the swap I thought the point was to make your own headband to swap... it's not. There's a $20 budget set on this swap. The rules state that you can still make your own though - as long as it's a quality product (i.e. something that you would definitely wear, might sell yourself, etc.). So, at this point I'm a little undecided on the exact route I'll go. I may buy something, I may still make something, I may do both. Probably both - cause it's more fun that way.
So of course, I've been browsing around looking for some awesome headbands on Etsy this afternoon... there are some really awesome headbands out there, let me tell ya! I have had this one shop in my favorites for awhile, and immediately thought of them as my first choice. Unfortunately, the shop is temporarily closed. So sad. Oh well.
OK, I'm off to go see what else I can find...
Saturday, January 15, 2011
Pom Pom Necklace
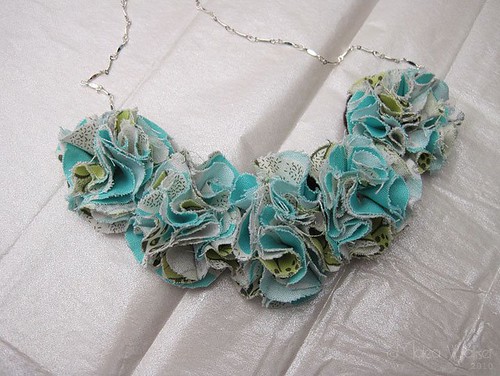
I just realized that I never posted about my awesome pom pom necklace that I made. It was a gift for my friend Desiree over at Chic Inspirations, so that's probably why I forgot to post something till now.
Isn't it super cute? I'm still needing to get a picture of her actually wearing it (she does wear it... at least she has once to work the other day - I just didn't have my camera with me).
I saw the tutorial for this over at Little Miss Momma, and today I saw she was doing a little linky party and that is what triggered my thoughts to get this posted :)
Anyway, go ahead and check out all the other awesome necklaces and pom pom headbands that everyone has made - there are so many awesome creations out there!
Bloggers Pillow Party - My January Entry
So I ran across this awesome bit of fun that they are doing over at Stitched in Color called Bloggers Pillow Party. Every month you can enter a pillow that you have made for a chance to win some awesome fabric. And you know I love me some new fabric! :)
Plus, I had just been thinking that I need to make some new pillow covers for my living room anyway... so this is perfect! I hope to participate each month... so here is my January entry...
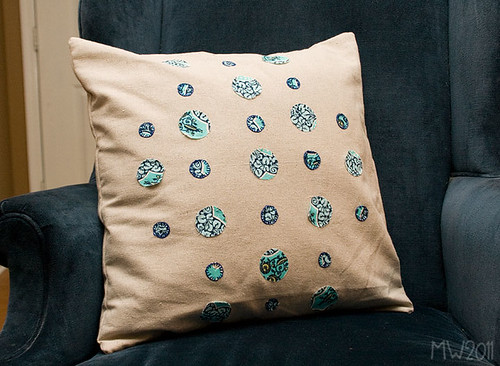
I have seen lots of fun applique pillow designs lately, and originally started off wanting to make something like this fabulous tree pillow at Cluck Cluck Sew. I still fully intend on making one like this too... but as I was going through my scrap bag I kept gravitating towards my scraps of Amy Butler Pressed Flowers in turquoise that I had. I love this stuff, but never had much of it in the first place... guess I need to get some more :)
Anyway, I kept trying to figure out what I could to with the scraps I had left and got started just cutting out various circles. I did roughly 2 different sizes and figured I could lay them out in a cool pattern.
This is how it came out... what do you think?
I made an envelope closure cover and before sewing the entire cover together, I stitched on the circles. At first, I was just going to machine stitch them on... but once I got started I realized how difficult it is to make a good looking circle using my sewing machine, so I grabbed some dark blue DMC floss and did a blanket stitch by hand around all of the little circles. There is no way I could have machine stitched those little circles and had them turn out right... so glad that I went this route.
I like how it's a little different on the big vs. small circles. The pattern is fairly predictable, but I like it just the same... just a simple grid. :)
Subscribe to:
Comments (Atom)


