Sunday, October 31, 2010

So Cute It's Scary - Quick Shirt-Redo

Happy Halloween!!

This morning as I went to get the kids dressed, I realized that they didn't really have anything "Halloween-ish" to wear today.  All I had was this cute little outfit that I bought last year...

it was in a 9 month size and the top wasn't going to fit either of the girls this year.  So... I came up with a brilliant idea... I'd use the embroidered part of the shirt and put it on a shirt that does fit!

(I'll warn you now, I forgot to take photos of most everything... sorry.  I'll be better at that next time.)

After searching through the closet to come up with a shirt that we could use, I found a white turtleneck onesie.  The onesie still fit width-wise but my oldest was still too tall for it to be worn as a onesie.

I simply cut off the bottom snap part of the shirt in a straight line right above the leg opening - allowing the shirt to be as long as possible.

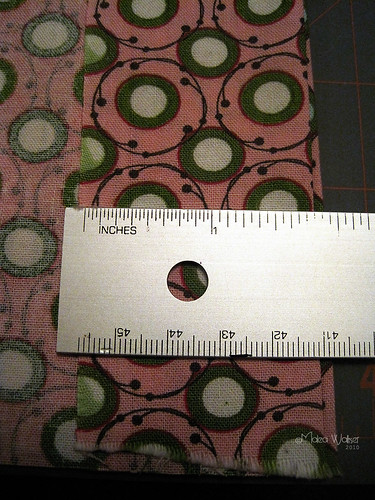
Still the shirt was now going to be a little too short, so I took out some of my scrap Halloween themed fabric that I had and cut two pieces to make a new bottom piece for the shirt.  I simply laid the shirt hem (or non-hem at this point, but where the hem would go) over the fabric to determine the width I would need, then cut it a little bit wider - wide enough to make the correct width once I stitched the sides together.

Then I stitched the sides together and ironed the bottom of the themed fabric up to make a hem, and pressed out the seams that I just sewed up too.

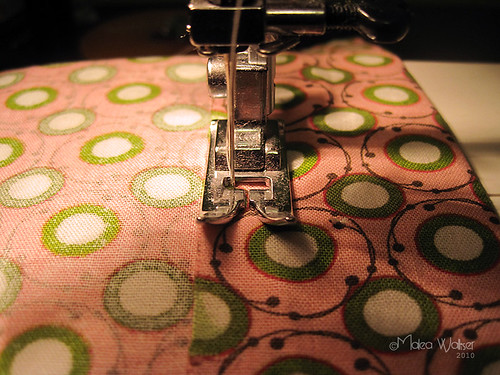
Come back to the sewing machine and hem the bottom of your fabric.  You should now have a band of themed fabric - one side hemmed, the other not.  Turn this band inside-out (so you see the wrong side).

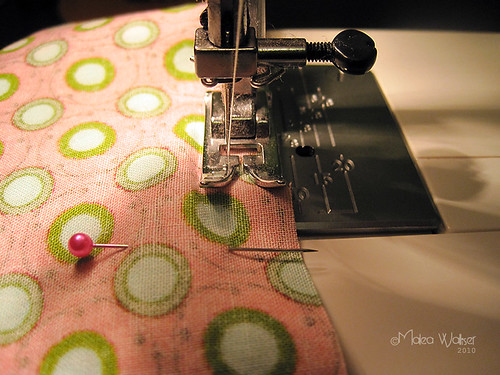
With your shirt right-side out slide the hem on over the bottom of the shirt - the right sides of the fabric will be together and the un-stitched sides will be together.  Pin the fabrics together, and stitch with at least a 1/4 in seam (depending on your preference).  Press out the seam.

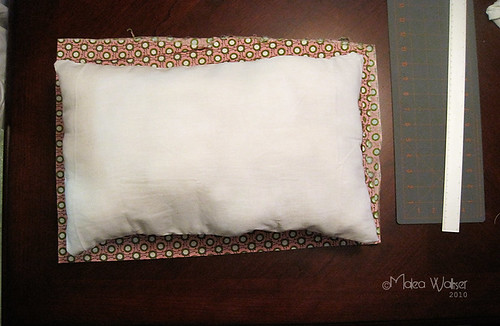
You now have a cute little band added to your re-purposed onesie. :)

Now, carefully cut the embroidered design off of the non-fitting shirt to the dimensions that you want it.  You can cut right around the design, or in a square or circle... whatever makes most sense.  Lay that piece on top of your themed fabric and cut out the shape in your themed fabric - only slightly bigger - depending on how much of the themed fabric you'd like to see.

I pinked my edges to keep them from fraying too badly, and so that I wouldn't have to be too careful about the stitching I did around the edges.

Pin your design onto your new shirt where you'd like it, and stitch in place.  I stitched the embroidered design piece on the themed fabric first, then stitched the whole thing on my shirt.  You can do it either way.  Even try some decorative stitches if you feel like it :)

And here is what you end up with...
Ta-Da!  Isn't that just adorable?  Not too bad for a super quick, last-minute holiday shirt, huh?  Seriously, this took me maybe 30 minutes to do - and that's with kids running around under my feet while I was working on it.

It looks even cuter on! :)  Don't you think?

So what happened with those cute little pants from the original set? Well, it seems that my youngest daughter is just a little short... so she can still fit in those pants just fine. She's wearing them with a little black turtleneck and couldn't be cuter! :)

Thursday, October 28, 2010

Quickie Frayed Fabric Flower

Tonight I've been working on a few different little projects all at once.  I started off with working on trick-or-treat bags for my girls (only a few days left to get them done!), but more about those later (I'll share once they are complete).

My friend, Desiree, was talking about making some cute fabric flower pins and she sent me a text message earlier with a photo of her first one...
Isn't it super cute?  You can't tell very well from this photo, but that bead in the middle is super gorgeous!  I know, I was with her when she bought it... :)

So, as I was working on my trick-or-treat bags I decided that I had to take a little break and make a frayed fabric flower pin for myself... of course in Halloween-ish colors to wear to work tomorrow :)

I followed this really easy tutorial by Maize Hutton.  Check it out, it only took about 5 minutes to make and minimal supplies.

Here is how mine turned out... what do you think?  Of course, I couldn't find my little bag with my pin backings so I had to settle for sewing a safety pin on the back instead.  It's not ideal, but it works just fine and you'd never know (if I didn't tell on myself).


More about those trick-or-treat bags later... They are turning out really awesome though so far, if I do say so myself :)

Wednesday, October 27, 2010

A Few New Fall Ideas

I've been looking around online and finding lots of really cool ideas to try and thought I might share a bit... hope you enjoy!  Let me know if you try any of these as well!  I'd love to see what everyone can do!

This super cute wreath is super simple and super fabulous!  It was made by Elise from one of my favorite blogs... I love her designs and super awesome craftiness :)  You can find the tutorial for this on her guest post at A Beautiful Mess.


Isn't this bag awesome?  I was searching for an idea of how to decorate some basic black totes that I have for the girls to use as trick-or-treat bags and found this awesome tutorial and pattern, by The Sometimes Crafter.  I wish I had found this sooner, as I certainly don't have time to make these for this Halloween.  They have definitely been added to the list for next year though :)  Be sure to check out her site as she's got tons of really awesome ideas listed!

How to Make a Ribbon Bow from a Plastic Straw (with pictures) - wikiHow

How to Make a Ribbon Bow from a Plastic Straw (with pictures) - wikiHow

The above link is something really cool that I came across today. I can totally see using this for making cute little bows for my daughters' hair and even to use on cards, scrapbook pages, and other paper crafts.

Have you tried this yet? If so, I'd like to see it! Send me a link!

Tuesday, October 26, 2010

Ruffle Bottom Bably Bloomers - First Attempt

Crappy camera phone picture, yes... but aren't these just adorable?

I was trying to think of something cute I could make as a baby shower gift and was inspired to make these darling little ruffle bottom bloomers.  They were super simple, and only took an afternoon to make (Yes, it probably could have been done in about an hour, but when you've got the little ones running around under your feet while working on projects, then an afternoon...)

These are my first draft, so I won't go into a ton of detail... I do plan to post a tutorial from the next pair that gets made though, so please check back in the next week or so if you are interested. :)

My sister is a photographer (the lovely Whitney of Caught You On Camera), she happened to have a photo shoot with a newborn the day after I made these so she took them to test out for me.  Unfortunately, they were sized a bit too small.  The next pair will need to be enlarged a bit all the way around.  Again, more details later - a tutorial and pattern if all works out right.

Saturday, October 23, 2010

Do You Like Doodles?

If you do any sort of digital scrapbooking, and especially if you are a fan of digital doodles like I am, then you have probably heard of or at least seen the work of the wonderful Kate Hadfield.  If you are as big a fan as I am, you'll love to know that she is having a drawing for your own custom doodle!  Come on, how cool is that?!


All you have to do to enter is head on over to her blog and leave a comment.  See, that wasn't too hard was it?  A winner will be picked randomly on 10/29/2010.  Good Luck!

Sunday, October 17, 2010

Toddler Pillow Tutorial

I've been meaning to make my daughter a pillow for a few months now.  She's gotten big enough to sleep with a pillow, and she's gotten to where she'll prop her head up on a blanket... so yeah, it's time she had her own pillow.  Of course, a normal sized pillow is a bit large for her crib (and soon to be converted toddler bed), so I had two choices... either buy one, or make one.

I of course, opted for making one.  Of course, I like making things, and this was something simple that I could do quickly... but also I've got this little pillow that my Mom made for me when I was a baby, and I've kept it and still have it on my bed to this day.  Keepsakes are always awesome.  She may not cherish hers the way I have mine... but who knows?  You never know what a child will latch on to. :)

So today... I finally got around to making my little girl her very own pillow.  I thought I'd share a quick easy tutorial.

Supplies you will need:
  • standard pillow case (or scrap fabric large enough for your pillow)
  • thread
  • needle
  • sewing machine
  • scissors
  • rotary cutter, cutting mat, and ruler (if you want to be really precise - you could just hand cut with scissors if you wish)
  • pillow batting/stuffing
  • colorful, fun fabric to make pillow case


I started off with a basic pillow case.  I had bought a pair of standard pillowcases at Target on clearance recently, and just figured it would be goo to use as scrap fabric.  Turns out it was perfect for this little project!

IMG_6817-web

Start by laying out your pillow case and deciding how big you want your pillow.  I left the width of the pillow the same as the pillowcase already was - no need to cause myself any extra work... plus, it was just a good size.  I then cut the pillow case approximately in half using my rotary cutter and a ruler.  I believe that made it about 12" tall.

Next, I turned the cut pillowcase inside out and stitched the open end closed.  I used a zigzag stitch on my sewing machine because it appeared as if it will be more sturdy.  You could really use any type stitch you want, as long as it is tight enough to be durable.

IMG_6818-web


Before you sew the entire side closed, remember, you are going to have to leave a space to be able to stuff the pillow.  About 3/4 of the way through the seam, I stopped and skipped a space.  You don't want it to be too big, or else you'll have a lot of hand stitching to do, but you do want it to be large enough to fit your hand through.

IMG_6822-web

After stitching the side, turn the pillow case right-side out again.  You should have what looks like a simple (unstuffed) pillow.

IMG_6823-web

Now take your stuffing, and start stuffing the pillow until it is as full and firm as you would like it. **I let my daughter help with this part... she thought it was lots of fun, until she got bored about half way through...** Now, you should have a fully stuffed pillow.

IMG_6828-web

All that is left to do now, is stitch up the stuffing hole. Simply, thread your needle and whipstitch it tightly closed.

IMG_6827-web

Now, you have your completed pillow! See, that was super simple and really quick!

IMG_6828-web

Of course, it's no fun just having a simple plain white pillow. Also, it will very easily get dirty - so you need to have a super cute pillow case to fit this custom pillow. Remember, since it's a custom sized pillow, you won't just be able to buy a new pillowcase at the store. Plus, it's more fun to just make your own with any fabric you (or your child) wishes.

And so to make the pillow case, I started by choosing my cute fabric and cutting it to size. I simply laid my new pillow on top of the folded fabric and decided how big it needed to be. Remember, you don't want to trace the pillow or it won't be big enough. Make sure you allow an extra inch or two all the way around, plus an extra 2-4 inches on one end. There are no precise measurements here, as it depends on your preference. My finished pillow measured approximately 12x18 so I cut the fabric to approximately 13x20. The case fits the pillow perfectly, so I could have cut the pillowcase fabric just an inch or so larger and it would have fit slightly loose.

IMG_6829-web

I made sure that I ironed my pillowcase fabric because it was very wrinkled after being washed, and I wanted to be sure that it was cut evenly.

After ironing the fabric, and laying it out, I noticed that I had a pretty uneven edge. So I took out my rotary cutter and ruler again and straightened the edge to make things even. If I hadn't done this then it would have been a little harder to sew a straight line when sewing the pillowcase together.

IMG_6831-web

Next, I folded what would be the edge of my pillowcase over about 1 1/2 inches. This makes the hem of the edge of the case. You can make this however wide you want, it's all about what you like.

IMG_6833-web

Now, head over to your sewing machine. Start by sewing the hem part of the pillowcase down first.

IMG_6834-web

Then sew the long sides shut. It can be helpful to pin the sides together to keep them even at this point.

IMG_6835-web

Trim up your stray strings, and turn your pillowcase right side out. You now have a perfect custom pillowcase for your brand new pillow!

IMG_6838-web

Now, try it on for size!

IMG_6840-web

IMG_6841-web

You now have a quick easy new pillow in maybe 30 minutes or less. The perfect quick easy project for busy Moms!

NK sure enjoyed her sweet new pillow!!

IMG_6849-web

It would also be fun to do some kind of embroidery on the pillowcase or even a little applique of some sort.  I may just try that when I go to make some back up pillowcases :)

My Adventure into Loom Knitting

I'm anxiously awaiting the delivery of my 2 new wooden hat looms that I ordered from DA Looms.  They make them special for you when you order, so it can take a little while to get them... but from the hype I read online, it's totally worth it.  I got an email that they have been shipped, so I should get them this week! :)

I have tried the Knifty Knitter Looms, and they are fine... but I feel like I really need to have only chunkier weight yarn, or else things look too spread apart.  I also have a really awesome Adjustable Sock Loom by Knitting Board, and a (soon to be tried out) 28" Knitting Board as well.

How did this whole loom knitting thing start out you wonder?  Well, as most of my new craft adventures begin... I was browsing through Hobby Lobby (or sometimes Michaels - but this time it was Hobby Lobby) and came across the Adjustable Sock Loom.  It came with all the pieces that I needed (just choose your own yarn) as well as an instructional DVD. 

You see, my Mom taught me how to knit (with knitting needles) when I was a teenager.  She taught me a few times actually, as I tended to forget the specifics after not knitting for awhile between projects.  I learned the most basic stitches, and how to cast on and off... that's it.  I successfully knitted quite a few scarves over the years.  That's about it.  I currently have a throw blanket sitting on a pair of circular needles that I started, oh about 3 years ago.  It kinda takes me awhile to work on knitting projects :)

So when I saw the sock loom kit, I thought "How cool would it be to knit my own socks?"  The loom is adjustable so you can make anything from a tiny baby sock to a large mens sock.  I got it home and found some time to watch the instructional DVD and learn how to get started, and that was that.  It was so much easier and quicker to knit on the loom than it usually takes me to knit on needles.

Finished!
For my first attempt at knitting socks, I figured it would be wise to start small... so I started with a toddler sized pair for my daughters.  It started off well, and the sock turned out pretty cute, except I totally mis-measured and it turned out a bit too long.  From the top to the heel, it was perfect, the heel fit my oldest's foot perfectly, and the width around her foot was great.  It was from heel to toe that it turned out a bit too long, and so just looks a little funny, and well, it unusable.  I didn't bother trying for the second sock in the pair.  I'll try again... with hopefully better measurements.

The loom made it so much easier for me to get a good stitch, to not drop stitches and I can even follow patterns now without loosing my place.  I especially like that I can stop in the middle of a row and not loose my place on a pattern.  Of course, I still only know how to do the basic stitches for now, so my extent of a pattern is a basic knit 2, purl 2 ribbing.  Basic, yes... but still looks great and serves some practical purpose (especially with socks, or hats).  It's going to be so much easier to add and subtract stitches too... now I can make things in shapes other than just a square or rectangle :)


Here's a little sneak peak at something I've been working on...
the beginning
Cute huh?  It's a gift for a friend of mine's baby shower... I've got a little less than a month to finish it, think I can do it?  Oh, I think it can be done :)  I'll share the whole thing once it's finished and been given to my friend - Don't want to spoil the surprise :)

Wednesday, October 13, 2010

Welcome

Hi!  Welcome to my brand new blog project!  I'm a mom of 2 little girls, I have a great husband, and I work a full time job.  In my very little spare time (usually after the girls are in bed) I love to work on various craft projects.  That is what I hope to share with you here the most.  Of course, you'll get a little glimpse into my life as a busy Mom, and my family life, but I hope that keeping this blog going will keep me inspired to keep creating new and interesting things.

As only having a few hours each evening, and occasionally some time on the weekends to work on projects, many things will either be quick easy projects, or other projects that might normally take an average of a few hours, but will take me a week full of evenings to finish.  Hopefully I can share some great ways for others to find a way to be creative every day, even when it's hard to find the time.

So, I hope you'll check back often to see what I've been up to!

... for now...
-Malea
Related Posts Plugin for WordPress, Blogger...