Remember when I made
my first Buttercup Bag and I mentioned that I was going to make another one, but the enlarged version? Well, I did... and now I'm finally getting around to sharing it with you :)
I made a few changes with this second bag that I think were definitely helpful, and made it turn out even cuter :)
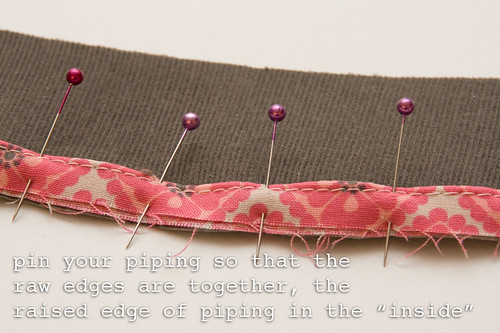
First, I had recently come across
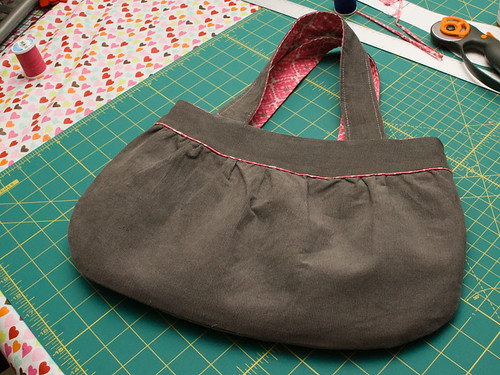
this tutorial for making your own custom piping and thought it was really cool looking. I had also been browsing through Flickr photos of the Buttercup Bag and got a bit of inspiration from other people's alterations. Mainly, to use the piping on the bag and instead of having a single strap - to make two separate handles.
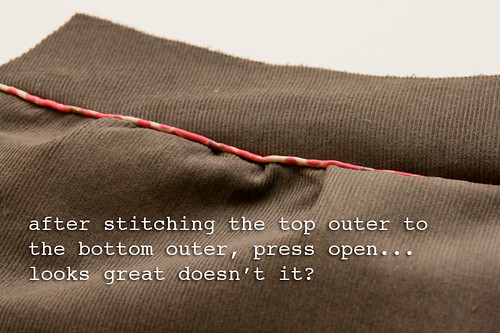
So I set out to make my own custom piping to match the lining fabric that I was using. I didn't have enough fabric to cut my strips of fabric on the bias, but that was really not necessary for this project. I could see where it would be necessary if we were putting the piping around lots of curved edges, but this was a pretty straight line, so it wasn't necessary.
I simply stitched the piping to the upper outer part of the bag before attaching that piece to the lower outer piece. It's really nice that if you don't get quite close enough to the edge of the piping then you can always re-stitch it to get closer.
Do you notice anything else a bit different about the photo above?
Instead of stitching the pleats in the lower outer pieces, I got a little lazy and just did a gather instead. Honestly, I almost like the look of it better... plus it was much quicker than having to measure, press, pin and stitch all of those pleats.
For the handles, I simply measured out how long I wanted them to be, then cut strips of fabric (two of the outer fabric, two of the lining) of that width and length plus my seam allowances. I pressed the edges of each piece and then did a top stitch all the way around to have the two pieces of fabric attached. Oh yeah, I also used some heavyweight fusible interfacing on the outer fabric to give it a little more strength.
Once the handles were assembled, I just marked where they should be, pinned and then stitched them as I was stitching the outer and the lining together. Simply make sure that your handles are on the right side of the outer fabric, but sandwiched between the outer and the lining (before it is turned right side out)... sorry, I forgot to get a photo of that part (I know it's a bit confusing, but maybe you get what I'm trying to say).
And here is the final product...
the outside
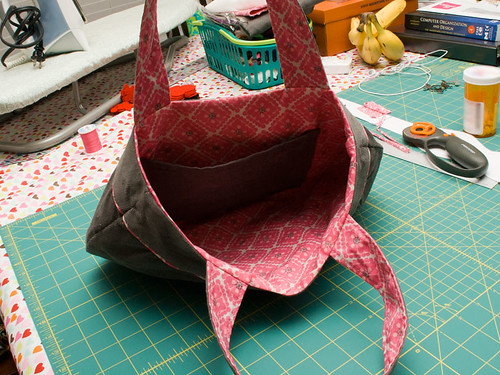
and the inside
Not too shabby huh?
*oh yeah, I kinda ad-libbed the pocket too - the size that the pattern called for was a little too small for what I needed.
Another difference between this finished bag and the first one I did (following the pattern exactly) was that I did not put in a magnetic closure... actually, I didn't add a closure at all. I honestly didn't think it was necessary, especially with the double handles.
I've been carrying this bag around ever since I finished it, and I just love it! It's still a little on the small side for me (I'm more of a big purse kinda girl), but it holds my essentials and is comfortable to carry.
I'll probably try to make another one sometime this year, but try enlarging the pattern even more. I'd also like to try adding in a zipper closure maybe.