
Well, as I was talking to some friends the other night about what to make for Jeremy's work Christmas party (everyone is supposed to bring a dessert - I'm sure there will be tons of sweets) and they both suggested peppermint bark! Sounds wonderful, and when I started thinking about it, it really made sense that it'd be pretty easy to do. Right?
Yes! Of course!
My basic way that I was thinking was to just melt some chocolate and crush up some peppermint and let it harden back up. Well, I figured that there just had to be a little something more to it than that so I Googled a recipe and decided to go with the one on AllRecipes.com that I found here.
You can check out their recipe for more details on how much of each ingredient they recommend, or just follow along here for some basic estimates. I don't really care for exact measurements when making things - that's just one more thing you have to wash - so I tend to really like making things where you can pretty much wing it and still come out with a great finished product.
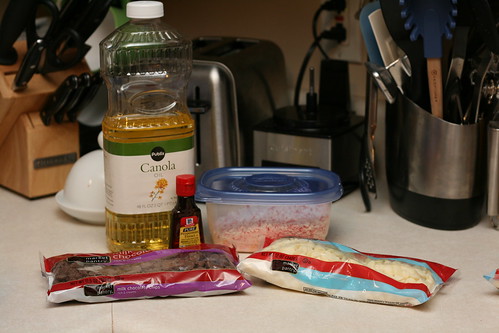
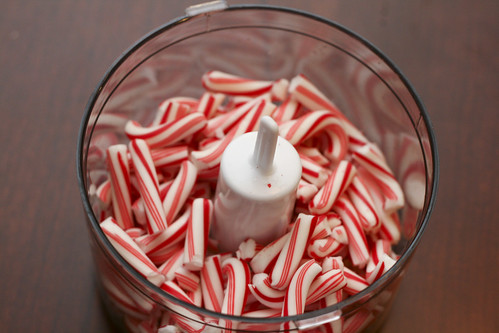
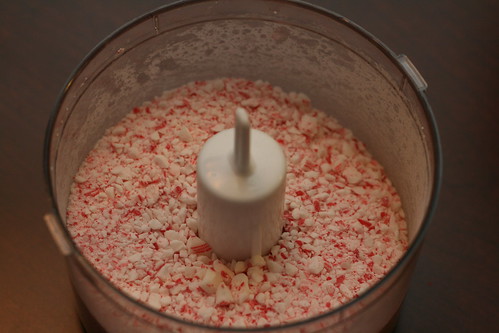
- candy canes (any size works but I had a box of the little ones)
- 1 bag milk chocolate chips (also use semi-sweet, dark chocolate, whatever you want)
- 1 bag white chocolate chips
- peppermint extract
- canola oil
Here's what I did:

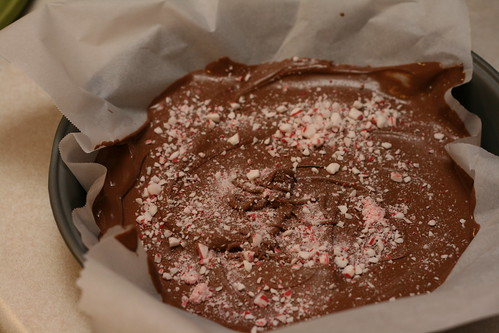
Set up your dish that you'll use to cool the bark - This time I used 2 9x9 round cake pans, but in the future I think it would be better to have a large cookie sheet. Line this dish with parchment paper (it doesn't have to be perfect).
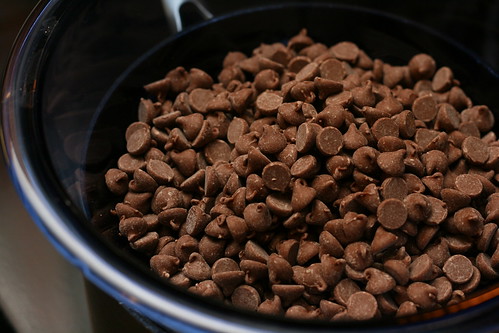
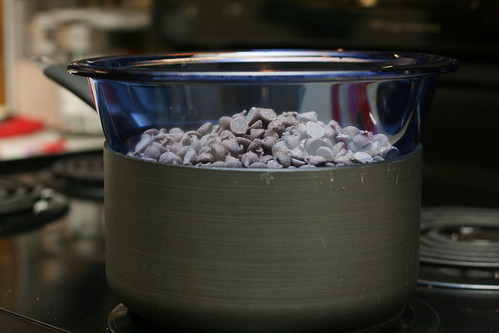
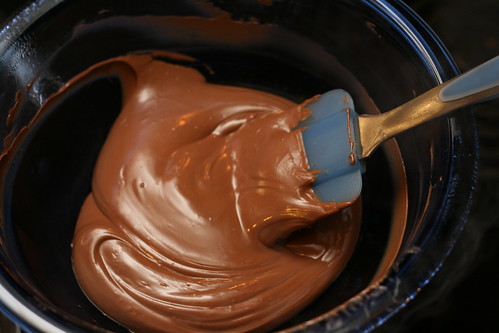
Put a tiny bit of canola oil in your double boiler and then your bag of chocolate chips. Stir the chips constantly while they melt.
Now wash your melting bowl, or just get a new one. You don’t want your white chocolate pieces melting with the remnants of your milk chocolate do you? Maybe you do… if so, you can skip this step.
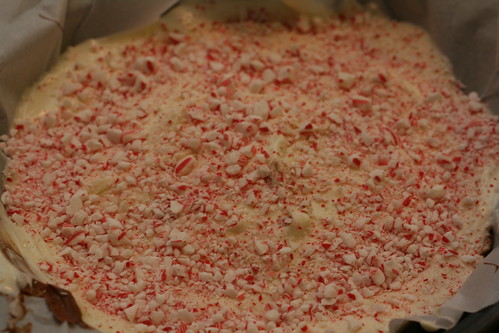
Repeat the chocolate melting process with your white chocolate pieces. The recipe calls for adding the peppermint extract to this layer too – but I didn’t. It’s your call… just depends on how much of the peppermint flavor you want in there.
Now break up your pieces of chocolate and enjoy!
See that was simple now wasn’t it? And tasty too!
I had Jeremy break up the chocolate pieces as I was heading out the door to work in the morning, so I didn’t get any photos of that process or what it looked like afterward. We took this to his work Christmas party, and then forgot it there. I did try a small piece and it was very good! Almost just like the pricey WS box but I probably spent about $8 for ingredients and was able to make more than what you get in that 1lb box.
Things I figured out along the way:
It’s better if you use a thinner layer of each type of chocolate – not too thin, but not too thick either.
It would have probably worked better to lay this out on a parchment paper lined cookie sheet instead of the round cake pans – the problem is that my cookie sheets won’t fit in my freezer (it’s a side-by-side) – so I’ll have to figure out a work around on that one. Any ideas?
A little peppermint extract goes a long way – use sparingly.

Enjoy! What will you be making this holiday season?
No comments:
Post a Comment