Several months ago my friend, Desiree, and I decided that we were going to put some things together and open up an Etsy shop together. We both love to make all kinds of craft projects and especially love fun accessories.
And so was born... DesiLea Boutique. Our grand opening is tomorrow, February 1st and I'm really excited to get things going! Fingers crossed that it is successful and continues to be a fun project for the both of us.
Anyway, I just decided that in honor of our grand opening... I'm going to have a giveaway. The details are being nailed down still... but check back here for more details. Or, be updated automatically when you "like" us on Facebook! Just check out the new box in the sidebar and like DesiLea Boutique!
Ooh... this is going to be fun! More details to come soon!
Monday, January 31, 2011
Sunday, January 30, 2011
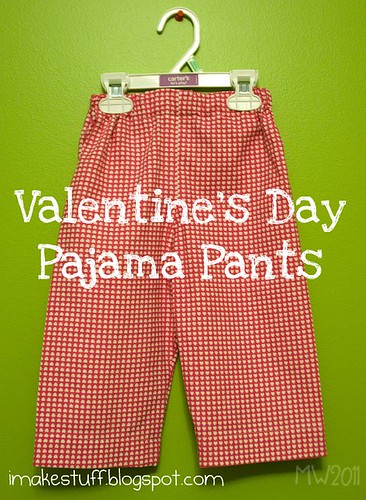
Valentines PJ Pants
I've been wanting to make some pajama pants for the girls for awhile now. I had big plans to make some for Christmas but ran out of time... so Valentine's Day PJ's it is!
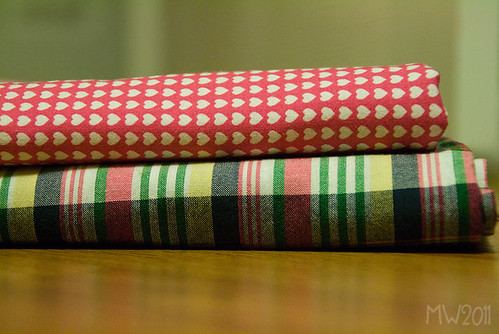
I stopped at the fabric store on my way home from work one evening and unfortunately there were some major slim pickings when it came to the Valentines holiday fabric. Fortunately... I found ONE that I liked. I was really hoping for two that coordinated but that wasn't happening... so this time I just had to make both pairs the exact same.
I'm not too big into making the girls stuff that matches exactly. It's pretty rare that I dress them the same... although I do like when they coordinate :)
Anyway, here's the fabric that I came home with... the madras plaid is for a future project (I'm not 100% sure what it will be just yet... but I'm making something with it :))
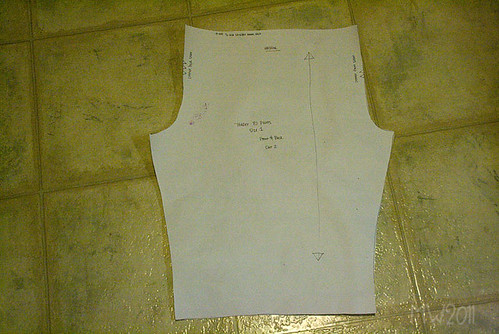
I spent one evening washing and pressing the fabric to have it prepped to start working with. I also traced my pattern on to a large sheet of paper. Why? Well... the pattern I used had sizes 1/2 to 4... my kids wear the size 1 and I figure I'll make plenty of these pants over the years. No need to waste my pattern and cut the thin little pattern paper. If you trace the pattern to a more sturdy sheet of paper then you can re-use it over and over.
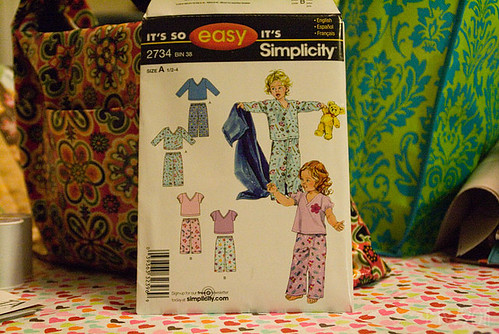
Oh yeah, the pattern... if you are curious, I used this Simplicity 2734. It says "It's So Easy" and it really is... These were super simple to make... just as I had hoped!
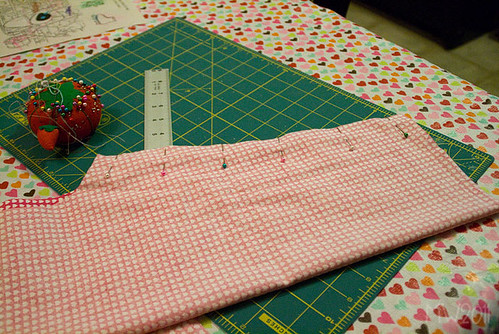
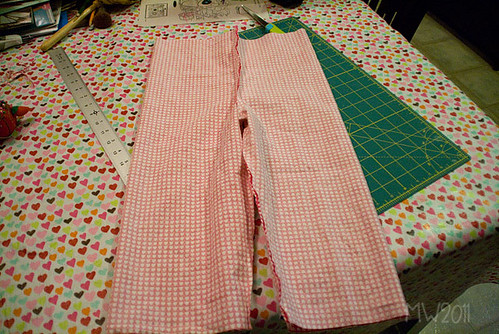
I began by cutting my pieces out then sewing the inner leg seams together.
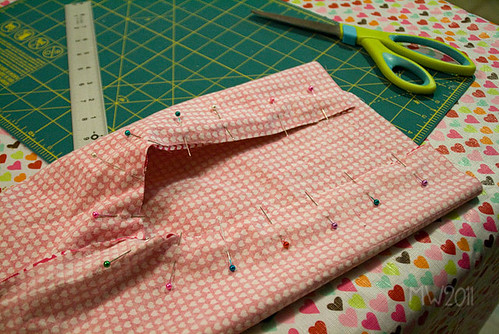
Then I slid one leg inside the other and stitched the crotch pieces together.
That's it... there are only 2 real seams on these pants! How simple is that?
All that is left now is to put in the waistband and then hem the pants. Sorry... no pics of that - it's pretty boring and basic, you understand :)
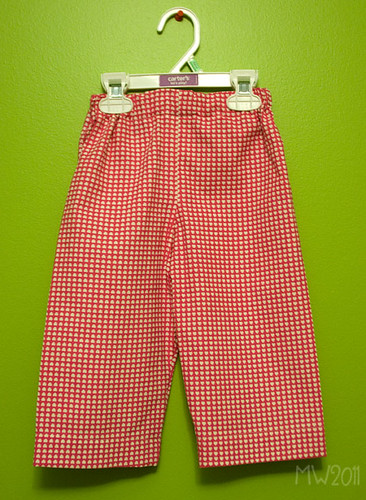
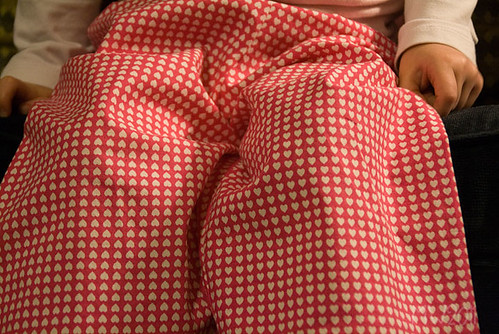
And here they are!
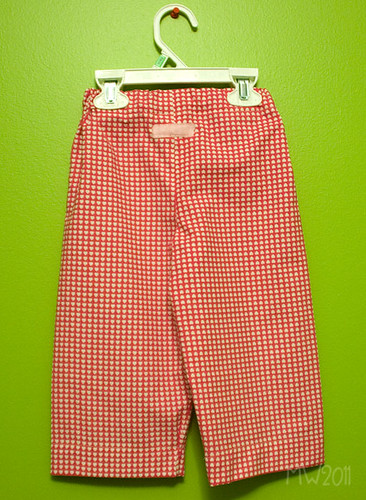
I added a little tab of felt ribbon on the back side as a little detail and to also let me know which side was the back.
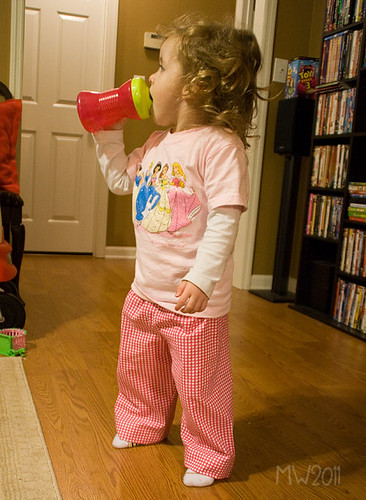
That's it! Cute huh? My little model was a bit too busy to be bothered by Mom wanting to take her picture... her eyes glued to Toy Story, of course :)
I actually made it through a project without any major issues... only one visible flaw too... have you seen it yet?
How about now?
Oh well... this was the result of my fabric being folded weird when I cut the pattern pieces out. I say it just adds a bit of character :) hehe
Linked up today's post to:



itching to go to the thrift store...
I've really been enjoying this blog lately. Not only does Danielle have some really awesome ideas and great taste (she's the one doing the headband swap that I am participating in), but she's super cute and kind of reminds me of my childhood friend, Erin.
Anyway, so I was browsing through my Reader list today and saw her post "thrifted" ...all I can think about now is how I really want to go check out some thrift stores to see what awesome finds I can find :) Thanks Danielle...
Oh if only I had more time... and space to put this stuff :)
Anyway, so I was browsing through my Reader list today and saw her post "thrifted" ...all I can think about now is how I really want to go check out some thrift stores to see what awesome finds I can find :) Thanks Danielle...
Oh if only I had more time... and space to put this stuff :)
Tuesday, January 25, 2011
Valentine Wreath
I finally got around to making my new wreath for my door... and taking down the Christmas one!
I've been planning this for awhile, but finally was able to get it all finished.
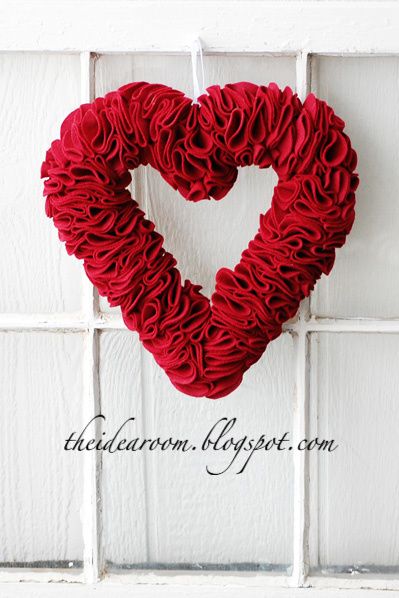
I had seen tons of great wreaths that I had liked and wanted to make. And then decided to get the supplies for this beauty that I found at The Idea Room.
I made a trip to Hobby Lobby on a lunch break and wasn't too wild about the size of the heart shaped wreath forms that they had. I wanted a bigger one. So I settled on a round wreath form instead. I started cutting my felt circles, and then stopped there. Why? Well, I still wanted the heart shaped wreath. No one else in town had any forms so I abandoned the idea and started looking for new ideas.
My friend Desiree over at Chic Inspirations had decided to make the heart wreath with a little different twist to use on the doors at the church for her wedding... they turned out really cute.
I came across one like this. This isn't the original site I found the idea on... but I can't locate it anymore right now - same concept though. When I saw the yarn wrapped wreath I thought that I might be able to make it neutral, and then just be able to change out the embellishments for different seasons/holidays. Always a good thing when you are short on storage space, right?
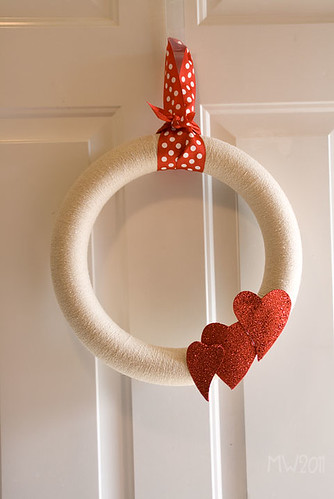
So, I had some neutral yarn and wrapped it around my styrofoam wreath form. There were some odd spots where it didn't wrap just right, so I figured I'd use those spots as a place to wrap my ribbon door hanger, and the place to add my embellishments.
I found a pick of glittered hearts at Hobby Lobby that I thought would be perfect! So, I just gut them off the pick with wire cutters, and used my new toy to glue them to the wreath. :)
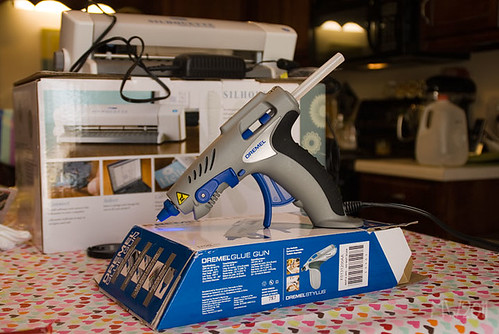
My new toy is this awesome bad boy right here...
it's a Dremel Hot Glue Gun and has interchangeable tips for more precise gluing (without all the excess glue everywhere that just isn't pretty). It's got different temperature settings and a neat little stand built in. Yep, pretty awesome.
Oh, and you can see my Silhouette in the background that I dug out of storage from the garage. I've had it about 2 years now, but haven't really done much with it. I've seen tons of awesome projects lately using it, so I dug it back out and will be playing with it soon... so check back to see what I do!

I've been planning this for awhile, but finally was able to get it all finished.
I had seen tons of great wreaths that I had liked and wanted to make. And then decided to get the supplies for this beauty that I found at The Idea Room.
I made a trip to Hobby Lobby on a lunch break and wasn't too wild about the size of the heart shaped wreath forms that they had. I wanted a bigger one. So I settled on a round wreath form instead. I started cutting my felt circles, and then stopped there. Why? Well, I still wanted the heart shaped wreath. No one else in town had any forms so I abandoned the idea and started looking for new ideas.
My friend Desiree over at Chic Inspirations had decided to make the heart wreath with a little different twist to use on the doors at the church for her wedding... they turned out really cute.
I came across one like this. This isn't the original site I found the idea on... but I can't locate it anymore right now - same concept though. When I saw the yarn wrapped wreath I thought that I might be able to make it neutral, and then just be able to change out the embellishments for different seasons/holidays. Always a good thing when you are short on storage space, right?
So, I had some neutral yarn and wrapped it around my styrofoam wreath form. There were some odd spots where it didn't wrap just right, so I figured I'd use those spots as a place to wrap my ribbon door hanger, and the place to add my embellishments.
I found a pick of glittered hearts at Hobby Lobby that I thought would be perfect! So, I just gut them off the pick with wire cutters, and used my new toy to glue them to the wreath. :)
My new toy is this awesome bad boy right here...
it's a Dremel Hot Glue Gun and has interchangeable tips for more precise gluing (without all the excess glue everywhere that just isn't pretty). It's got different temperature settings and a neat little stand built in. Yep, pretty awesome.
Oh, and you can see my Silhouette in the background that I dug out of storage from the garage. I've had it about 2 years now, but haven't really done much with it. I've seen tons of awesome projects lately using it, so I dug it back out and will be playing with it soon... so check back to see what I do!

Labels:
handmade,
holiday,
home decor,
Valentine's Day,
wreath,
yarn
Monday, January 24, 2011
my baby fresh couch
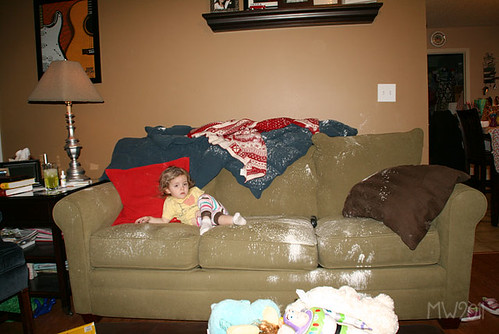
This is what happens when you leave your toddler alone to watch her movie (dad was washing dishes right around the corner) and there is a powder bottle in her reach :)
On the bright side... my couch smells baby powder fresh!
headband almost complete!
I'm glad I decided to also make a headband for this headband swap in addition to the one I purchased... because, well... I'm afraid that the one I bought on Etsy won't make it here in time. We are supposed to mail our headbands out by next Monday 1/31 - so there is still time. But just in case... I at least have a back up plan.
The only reason I'm a little worried is that the shop that I've been stalking for awhile that I mentioned was closed and empty - started stocking their stuff up again, and I didn't see the notice still on their front page about them being closed still (or maybe they aren't closed still, but jut forgot to remove the notice) I don't know. Anyway, I bought 2 headbands from them (one for my lovely partner and one for myself) and well... that's it. Here's hoping they get here in time... if not, I'll just send along my lovely headband by the deadline and just send along the other when it gets here.
Don't worry there though swap partner... the one I made is super cute, and totally not covered in hot glue (as warned by Danielle) :) I hope you'll like it... I totally do!
The only reason I'm a little worried is that the shop that I've been stalking for awhile that I mentioned was closed and empty - started stocking their stuff up again, and I didn't see the notice still on their front page about them being closed still (or maybe they aren't closed still, but jut forgot to remove the notice) I don't know. Anyway, I bought 2 headbands from them (one for my lovely partner and one for myself) and well... that's it. Here's hoping they get here in time... if not, I'll just send along my lovely headband by the deadline and just send along the other when it gets here.
Don't worry there though swap partner... the one I made is super cute, and totally not covered in hot glue (as warned by Danielle) :) I hope you'll like it... I totally do!
finally tried vinyl
So... everyone has been doing all this super awesome stuff with vinyl and their Silhouette machine. I have a Silhouette that has been boxed up for the past 2 years in the garage. Why? Well, I have the original Silhouette and originally, the software was only for Windows machines. I have a Mac. So, I used it a few times using my old laptop then got annoyed at not having a place to be able to set everything up... and having to design things on one machine then take the files to another to cut it all up. So... it got boxed up.
Well, with all the hype about Silhouette machines lately... I discovered that they had updated the software and it would work with my Mac now! Yeah!
Anyway, like I said... there have been tons of awesome vinyl projects out there lately and I really wanted to try it out on my machine. So I stopped at Hobby Lobby last week and got a roll of vinyl using my 40% off coupon :) Yeah! That meant I paid about $4.99 for a 10 foot roll :)
I finally got around to figuring out what I wanted to cut... and had at it.
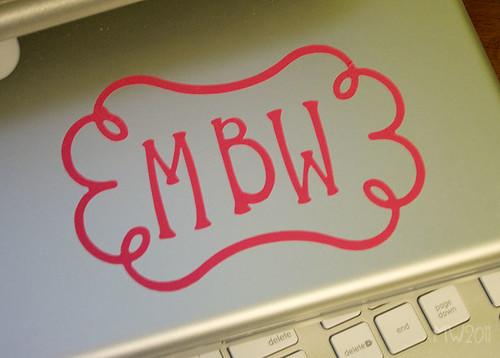
Awesome huh? A new vinyl label for my laptop. Not that I need to tell it apart from anyone else as it rarely leaves my house... but it's pretty. And was the perfect starter vinyl project :)
I now want to do something really cool on my Kitchenaid mixer like this... by Sophie at Sophie Gallo Design
Maybe even something cool on my sewing machine :)
One thing I did notice was that it took forever to cut this simple design. My machine kept "thinking" in between cuts. Not sure if that is normal, or what the deal was... but eventually it worked out ok. Has anyone else had this problem??
Well, with all the hype about Silhouette machines lately... I discovered that they had updated the software and it would work with my Mac now! Yeah!
Anyway, like I said... there have been tons of awesome vinyl projects out there lately and I really wanted to try it out on my machine. So I stopped at Hobby Lobby last week and got a roll of vinyl using my 40% off coupon :) Yeah! That meant I paid about $4.99 for a 10 foot roll :)
I finally got around to figuring out what I wanted to cut... and had at it.
Awesome huh? A new vinyl label for my laptop. Not that I need to tell it apart from anyone else as it rarely leaves my house... but it's pretty. And was the perfect starter vinyl project :)
I now want to do something really cool on my Kitchenaid mixer like this... by Sophie at Sophie Gallo Design
Maybe even something cool on my sewing machine :)
One thing I did notice was that it took forever to cut this simple design. My machine kept "thinking" in between cuts. Not sure if that is normal, or what the deal was... but eventually it worked out ok. Has anyone else had this problem??
Subscribe to:
Posts (Atom)