Showing posts with label found patterns. Show all posts

Saturday, June 25, 2011

And... Done!

OK, so I'm feeling a bit better after my long to-do list this morning.  Today I did actually get some work done around the house plus I got around to making 2 dresses!  Yup.. TWO of them!  I even got a few more rows knit on my sweater as well :)

My sister came by after stopping and picking up some fabric at JoAnn.  I took a few measurements and got started with her new dress(es).   A few days ago, my sister, Whitney (of Caught You on Camera), sent me a link to the McIntosh Knockoff Dress at Maybe Matilda... and asked me to make her one.  It's a super cute dress and honestly, really very similar to my Kate Dress that I have made for my daughters.  Same basic concept, except the McIntosh Knockoff features this really fun sash and the best part... pockets!

I was really excited to make a dress with pockets in it... I've never done it until today, and I must say I'm hooked!  I'll probably never (or rarely) ever make a skirt again without pockets.  Shoot, I might even go take a look in my closet and start figuring out which dresses and skirts I could add some pockets to.  hehe  I better slow down though for now. :)

Anyway, the tutorial was super easy to follow and really simple to do.  To be perfectly honest, if you can cut a square/rectangle and sew a straight line, then you can make this dress.    Here's how mine turned out...

This was the first one I made...
McIntosh Knockoff Dress


McIntosh Knockoff Dress
I followed the directions exactly - the measurements given in the tutorial were exactly the same as my sister's measurements - how lucky is that!? :) We measured to have the waist of the skirt fall right below her belly button.

On the second one, we made the skirt about an inch above the belly button.
McIntosh Knockoff Dress

McIntosh Knockoff Dress
This one I did a little more A-line. I didn't have a skirt to trace, so I just cut my squares a little wider then folded in half length-wise and cut a diagonal line from the top to the bottom, making sure that I left the width of the waist large enough so that I could gather the skirt still. I just did a straight hem on this skirt and it worked just fine.

The only problem we had was with the sash.  I didn't cut it long enough the first time around, so I ended up going back and having to cut it and add more.  The extra fabric is still here so I think I'm going to re-do the sash to make it look better.

Oh yeah, and the sash... this was the fun part of how it turned out for me - I had the idea that since the fabrics that Whit brought over coordinated, that we could make the sash double sided.  This way I only had to make one sash and also both prints would show when it was tied, adding a little bit more fun to the outfit. :)

These dresses would be really cute with various belts really... just to mix up the outfit a bit...

I'm going to make myself one soon hopefully!!

Friday, April 22, 2011

What I'm making this weekend...

There are so many things that I want to work on right now... and for some reason I keep looking at even more cool ideas.  I am really bad at finding lots of project ideas, then never getting around to actually making them.   My most recent obsession has been crochet hats and flowers :)

Despite all of the fabulous ideas out there, I really can only do so much... so here are my to-do's for this weekend.

  1. Netbook Case - A friend at work asked if we (me & my DesiLea Boutique business partner) could make her a netbook case.  This was right about the time that we had come across this tutorial for an iPad Case.  I'm going to follow the basic rules of the tutorial but adjust the size to fit the dimensions of the netbook.  I promised to bring this finished on Monday, so it has to be the top priority on my craft list this weekend :)  I can't wait to see how it turns out!  Stay tuned!
  2. This Sweet Hat - Awesome huh?  I've been wanting to make one of these cute brimmed hats ever since I first saw them.  I like to try a newborn size first to get a feel for the pattern, since that's the smallest size.  This first one (if all goes well) will turn into a sweet gift for a friend's new nephew who should be born any day now.  I can't wait to see how this turns out!
Realisitcally, I think that's about all that will get done this weekend.  Hopefully I'll get the chance to get a few photos of SQ in her brand new hat that I just finished...

Toddler Size Hat!
Please excuse the cell phone photo for now... This is why I really want to get some good ones of it being worn tomorrow :)

Cute huh?  It's so super soft too!  I absolutely LOVE the cotton yarn that I used for this... I wish it came in more colors (maybe it does, and my store just didn't have them all), I'm thinking this is my new go-to yarn for anything baby/kid related.  Oh... it's I Love This Cotton Yarn in Pistachio for the main hat and Pink for the light pink flowers. The dark pink is just something extra that I had in my stash - I can't remember what it is, but it's not nearly as soft.

Anyway, it's looking like it will be a pretty busy weekend so far.  In the morning I think I'll pack up the girls and go do a little bit of shopping.  I totally need a new pair of denim capri pants to wear... my ones from last year are TOO BIG! (awesome huh?!).  While I'm out with the girls I think I'll leave my husband home to mow the yard. :)  Then hopefully the rest of the day I'll be able to get a little bit of cleaning and stuff done around the house and of course work some on the projects listed above.

Sunday will be very busy!  We'll be heading over to see both sides of the family - lunch at one house, dinner at the other.  My only concern is when will the girls get their nap?  I really didn't think it through when I committed us to go to both places.  Oh well, it will work out just fine :)

I'll be back with some updates about the projects as soon as they get finished :)

Tuesday, March 29, 2011

St. Patty's Day Skirt

Yeah... I'm a few weeks late posting this... I know...

I did make a cute and comfortable skirt that I wore for St. Patrick's Day this year - because it's green, of course!  :)

stpats_green_skirt

I found this post with this awesome skirt pattern and although I didn't exactly follow instructions exactly, my skirt turned out pretty cute.  It's got the same waistband concept as the pattern and that is what made is really comfortable.

What do you think?  

Tuesday, March 15, 2011

A First of Many - Peasant Blouse

When I found this tutorial for a child's peasant blouse at Prudent Baby I just knew that I had to make one for the girls.  If it really was as easy as it looks, then I'd make several.  I mean seriously... what a perfect addition to any little girl's wardrobe.

Peasant Top

Well, I am happy to announce that it really was as easy as it looked.  I followed the measurements that were listed for the 18mo - 2T size because, conveniently, that was the exact size that I needed (it's always nice when you can follow the instructions exactly as written instead of having to do the math to make it a different size).  The instructions were perfect and super simple to follow.

I've been really needing some sort of project that could give me some instant gratification and this was definitely a great one for that.  It took me most of the day (between wrangling two toddlers, one of whom was sick) but could have easily been done in about an hour for those people who can sit for an hour and just work on a single project.

Of course, I made a few customizations myself though.  I did not add the waistband elastic piece from the original tutorial.  I might try it out on future versions just for some variety, but didn't feel like it for this one.  But, I did add some cute little pockets on the front.

Peasant Top

I really like this fabric because it's almost got a vintage feel to it.  Nora actually picked it out herself when we were at the fabric store this past weekend.  It was cute and on clearance, so of course I couldn't say no.  :)

Another thing that is so awesome about this top... I really think that I could make it using 2-3 fat quarters (depending on the size).  I'll probably try that at some point and let you know how that turns out. :)

Peasant Top
As you can see, my model wasn't really up for the job tonight - too busy watching Toy Story. :)

I like how versatile this type of top is.  You can wear it as a shirt, or as a dress.  With short sleeves, long sleeves, or even no sleeves if you wanted.  It's nice and cool when the weather is hot but can also be worn with a long sleeve shirt underneath during the colder months.  I definitely see myself making lots of these types of tops in the future - maybe even eventually one for myself!

Wednesday, March 9, 2011

large(er) version of my buttercup bag

Remember when I made my first Buttercup Bag and I mentioned that I was going to make another one, but the enlarged version?  Well, I did... and now I'm finally getting around to sharing it with you :)

I made a few changes with this second bag that I think were definitely helpful, and made it turn out even cuter :)

First, I had recently come across this tutorial for making your own custom piping and thought it was really cool looking.  I had also been browsing through Flickr photos of the Buttercup Bag and got a bit of inspiration from other people's alterations.  Mainly, to use the piping on the bag and instead of having a single strap - to make two separate handles.

So I set out to make my own custom piping to match the lining fabric that I was using.  I didn't have enough fabric to cut my strips of fabric on the bias, but that was really not necessary for this project.  I could see where it would be necessary if we were putting the piping around lots of curved edges, but this was a pretty straight line, so it wasn't necessary.

lgbuttercup_pinpiping

I simply stitched the piping to the upper outer part of the bag before attaching that piece to the lower outer piece. It's really nice that if you don't get quite close enough to the edge of the piping then you can always re-stitch it to get closer.

lgbuttercup_stitchouters

Do you notice anything else a bit different about the photo above?

lgbuttercup_gathers

Instead of stitching the pleats in the lower outer pieces, I got a little lazy and just did a gather instead.  Honestly, I almost like the look of it better... plus it was much quicker than having to measure, press, pin and stitch all of those pleats.

For the handles, I simply measured out how long I wanted them to be, then cut strips of fabric (two of the outer fabric, two of the lining) of that width and length plus my seam allowances.  I pressed the edges of each piece and then did a top stitch all the way around to have the two pieces of fabric attached.  Oh yeah, I also used some heavyweight fusible interfacing on the outer fabric to give it a little more strength.

Once the handles were assembled, I just marked where they should be, pinned and then stitched them as I was stitching the outer and the lining together.  Simply make sure that your handles are on the right side of the outer fabric, but sandwiched between the outer and the lining (before it is turned right side out)... sorry, I forgot to get a photo of that part (I know it's a bit confusing, but maybe you get what I'm trying to say).

And here is the final product...

the outside
buttercup bag - large

and the inside
buttercup bag - large

Not too shabby huh?

*oh yeah, I kinda ad-libbed the pocket too - the size that the pattern called for was a little too small for what I needed.

Another difference between this finished bag and the first one I did (following the pattern exactly) was that I did not put in a magnetic closure... actually, I didn't add a closure at all.  I honestly didn't think it was necessary, especially with the double handles.

I've been carrying this bag around ever since I finished it, and I just love it!  It's still a little on the small side for me (I'm more of a big purse kinda girl), but it holds my essentials and is comfortable to carry.

I'll probably try to make another one sometime this year, but try enlarging the pattern even more.  I'd also like to try adding in a zipper closure maybe.

Sunday, February 20, 2011

Autism Awareness Bow Tie

I got a message from a friend of mine last week asking for some help with a project.  Annie teaches Autistic children, and has been making some flower pins for her fellow teachers using the Autism puzzle print fabric.

There was one issue though, the school's Principal is a man... and well, she didn't think that he'd be very willing to wear a flower pin.  He does wear bow ties though!

This is where I come in... Annie asked if I could help her make a bow tie for her Principal.  That sounded like fun, and pretty easy so I told her I was in.

So, before she came over I wanted to be prepared and have the pattern and supplies ready.  It's kind of hard to find a free bow tie pattern.  The first one I found didn't really work too well when I tried to print it, so I looked some more and found a post on Greg's Blog.  The instructions show how he used a bow tie that he already had to trace a pattern.  After a few requests, he drew up the pattern to share with the rest of us.  You can find his pattern in the comments on his post.

Anyway, here it is... don't laugh at the photo (this was the best we could do with tying the bow tie - it definitely takes practice)

autism bow tie

Cute huh? It will look even better on her Principal (who does wear bow ties, so we figure he actually knows how to tie them correctly).

Have you ever made a bow tie?  Do you know anyone who would wear one?  This was definitely a super simple project and was quite quick to finish.  I could totally see making up a whole stash of these in an afternoon.

Next, I'd love to try to make some already tied ones with an elastic adjustable piece for younger boys.  They'd make great gifts for friends to use for holidays or other special occasions.


Tip Junkie handmade projects

Tuesday, February 15, 2011

My Buttercup Bag

One of my goals this year was to make myself a purse.  At least one, and make sure it's wonderful!

I came across the cute little Buttercup Bag pattern on the Made by Rae blog recently.  I was excited to see that the basic pattern was offered free, but then a little sad when I found out that it was no longer free.  The download wouldn't work and after a little research it seemed that it just wasn't offered anymore.  I liked the idea of being able to try it out "risk free" and planned on purchasing the pattern if all went well, so that I could make some to sell in my shop.   Oh well, so much for that plan.

I was ready to give up and find another pattern to try but my mind kept going back to the Buttercup bag... the comments people had left made it sound like the pattern and instructions were easy to follow, so I gave in and spent the $$ to buy the pattern.  I mean, I was planning on buying it anyway... so what's the loss here?

No loss at all! The pattern ended up being pretty simple to follow and I honestly could have finished the entire bag in one evening (about 4-ish hours) if I hadn't kept having issues and sewing my handle inside the lining (totally my fault).  Well, OK... I did pick out my fabrics and cut the pieces the evening before and then assemble them the next evening.  So maybe total it would have taken 5 hours.

Anyway, here is how my first bag turned out... what do you think?

My Frist Buttercup Bag :)

The outer fabric is a thick linen type fabric.  I'm not sure exactly what it is... it's one I found in my stash from years ago - but that's kind of what it's like.  It was a little hard to sew in some of the thicker areas (like on the handles), but if you go slow enough then it wasn't too bad.

The lining fabric was a fat quarter that I had lying around that went really nicely with the solid brown linen.  Oh, did I mention that this entire bag could be completed with less than 2 fat quarters?  One for the lining and one for the outer... awesome huh?

The only thing I don't like about this bag is that the magnetic closure seems a bit heavy for the bag itself.  I probably could have found a smaller one that would work better.  I'll definitely remember this for future bags!  A velcro or zipper closure would have worked too...  I'd really like to figure out how to add a zipper closure because that would be ideal... for me at least.

I've got another bag cut out and ready to assemble.  This time I'm making the larger version - because I really like bigger bags - the small version is wonderful if you like small bags, but I couldn't carry everything I need in it for everyday use.

Do you like my fabric choices?

fabric_choices_bcbag2_web

I've got a gray corduroy (from JoAnns) and some pink/gray patterned fabric (from Hobby Lobby).  I think I'll put some more interfacing in the next bag too - just to make it a little more sturdy.  I've also found some smaller/lighter weight magnetic closure pieces... so hopefully that will work out better too.

I'll be sure to share once I've got this one finished :)

Have you tried this pattern?  Any tips you'd like to share?  Please leave them in the comments :)


Sunday, February 6, 2011

Experiments with patchwork...

I got this book (I Love Patchwork: 21 Irresistible Zakka Projects to Sew) for Christmas and decided that I was going to start off with the little patchwork bag project.
Photo from book

Cute huh?  I had run across this post and The Crafter's Apprentice and that gave me a little extra push to go ahead and have this be my first project (there were quite a few really cute ones that I was trying to decide between).

Anyway... here is how mine turned out...

patchwork_makeupbag_finished

Not bad, huh? Well... it was a struggle.

This is my first ever patchwork project... so my blocks don't line up exactly. I partially blame this on the fabric (it wasn't the easiest to work with). Oh well. It takes practice.

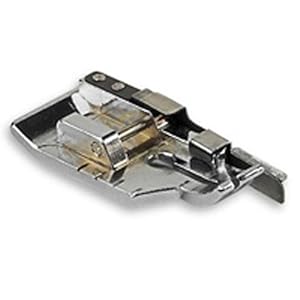
One thing that I have found invaluable for piecing pieces of fabric together (quilting, anything patchwork, anything with a 1/4 seam) is my new 1/4" quilting foot. Wow this thing was so helpful!
There are a few things about the book though...

I noticed that the illustration in the book where it shows you how to lay out your squares is backwards. It shows a solid linen square where the patterned fabric is supposed to be. I started laying out my squares according to the book and got confused when I didn't have the right number.

They obviously got it right when they made theirs for the book (it's correct in their finished photo) so It's just lazy for them to not have it right in the illustration.

This is how it should be
patchwork_makeupbag_layout

Anyway, so I got started piecing and ironing and had all the pieces assembled. Now to attach everything together. This is where the zipper comes in.

well, I started reading the entire rest of the instructions to figure out how everything goes together. I did not like how they had written the instructions to attach the lining though. I really didn't want to hand stitch the entire lining to the bag (and have to be careful enough to not let my stitches go all the way through. Too much hassle!

So, I made a few adjustments - this caused me to make some changes on how the zipper was inserted.

I started by laying my outer piece right side up and the zipper face down on it and stitching it with my zipper foot. This has the same effect as the instructions in the book (which said to press the edge down 1/4" and then stitch with the outer piece on top of the zipper - which would cause the stitch to show on the outside) but mine does not show the stitches on the outside.

patchwork_makeupbag_attach_zipper

(oh yeah, sorry for the difference in quality of the photos here... I just grabbed whichever camera was closest to me)

See?
patchwork_makeupbag_attach_zipper_after

I did follow instructions for the next steps - but they were a bit confusing. Here is how I did it...

Here you have to reinforce the zipper ends, I slid the tube of fabric around my machine and stitched back and forth a few times at the ends of the zipper. Be careful and go slow - you could easily break your needle if you hit the wrong part of the zipper.

patchwork_makeupbag_reinforce_zipper

And you get this...
patchwork_makeupbag_reinforce_zipper_end

Now you will stitch up the sides. I kept the zipper closed while I was stitching the first side to make sure that it was lined up correctly.

When you flatten your bag so you can sew it, fold the zipper part in half - so that you can stitch right up near the edge, but don't stitch all the way through the zipper this time.
patchwork_makeupbag_stitch_edges

Now, open your zipper (at least enough to get your hand through) and then stitch up the other side the same way.

Turn it right side out to admire your work!

OK, really... you aren't done quite yet.

I followed the instructions for stitching the bottom corners of the bag - except I kind of measured wrong and took it in 1 1/2" instead of the written 1". Oh well. It was too late to change it when I noticed this. It just makes for a smaller bag on the bottom.

Now, you need to attach the lining.

I stitched up the lining as instructed and slid it over my outer piece (you'll have to turn the outside piece inside out again).

When I went to iron down the 1/4" seam allowance at the top (so that there is a clean edge) I noticed that my fabric wasn't quite tall enough to do so. I know that I measured my piece correctly... so there is another flaw in the written instructions.

This is where my trusty Heat-N-Bond tape came to the rescue!

I simply ironed on the tape where I needed the fabric to stick to...
patchwork_makeupbag_adhesive_tape

Then took off the paper and ironed my lining down to it (being sure to turn the edges under at least a little bit).
patchwork_makeupbag_lining

Not bad, huh? Now, since this tape is so strong I guess I could have just left it like that. But, it really did need the top stitching - and it's always usually much better looking that way.

So I took my zipper foot and attached it to my machine again and did a top stitch around the top edge of my bag.  Going around or near the zipper ends was tricky though.

On the end where the zipper pull was (when it's unzipped) I even broke my needle and jammed up my machine for a little bit.  Not cool.

I decided that since I couldn't easily get to that one little bit of area to finish the top stitch, that it could just stay open there.  The Heat-N-Bond tape is holding the lining to the bag, so it's not technically needed at least.

patchwork_makeupbag_missing_stitches

I think that if there were some tabbed ends on the zipper part, like I have done before using this tutorial, then that might have helped a good bit on the zipper troubles.

patchwork_makeupbag_finished

So, it's done... far from perfect but it's OK.  It will either be used by me... or maybe I'll give it to the girls to play with so I'm not really concerned about it being "just right"... Lessons learned at least.  If I try this bag again I've definitely got some ideas on how to adjust it to make it better.


handmade projects Photobucket

Sunday, January 9, 2011

Another thing I have to try...

Came across this awesome tutorial today... thinking it will be something great to try and make for the girls this Spring. I've got lots of awesome fabrics in my stash that would make a great skirt for this dress! I can't wait to try it!


Find the tutorial here at Make It and Love It.

Monday, January 3, 2011

Gathered Clutch

I followed this Gathered Clutch Tutorial at Noodlehead.

gathered clutch - Auburn version

I've been wanting to make one (or some) of these ever since I came across the tutorial on Noodlehead a few months ago.  I could never find the time with all the other things I was trying to get done... plus I had never made anything with a zipper before and it was a little scary.  My mom used to complain about sewing zippers so I was kind of scared off from the begining.  But after looking through the tutorials, it really didn't look all that difficut.  Maybe it's different in clothing or something... who knows.

Anyway... it's my Sister-in-Law's birthday and I figured there was no better occasion to try these out.  It's hard to think of something to get someone especially when their birthday is right after Christmas, but I figured this was something different and totally unique.  I hope she loves it!  We stashed a gift card inside as well.

Here's a view of the inside.  It features a divider pocket and 2 card pockets.
gathered clutch - inside view

Here are a few things I thought of when making this... Notes for Next Time:

As Anna says in the tutorial, the part that is going to take the longest is cutting the pieces.  So true - especially since I wasn't completely following directions and ended up wasting interfacing and outside pieces because I ironed them wrong.  Oh well - I'll just save it for the next time when I need those pieces.

The instructions called for an 8" zipper - all I had was a 7"... so I simply extended the size of the tabs to make the entire zipper piece a total of 8.5" as stated is necessary.  This worked out great, the zipper is the exact right size for this bag.

I didn't sandwich my lining/outside/zipper pieces just right when I was attaching the second one.  Therefore, the raw edges show.  It's not so bad, but it wouldn't look like such a mistake if I had messed up on both sides instead of just the one side... oops.

I think I'll make some bags with it gathered on both sides.  Also, I may use ribbon instead of the fabric band.

I really want to dress up the band a little more.  Maybe I could even take the time for some little embroidery design or something on a solid band.  *If I ever get my embroidery machine then I might even make some monogram ones :)

By altering the size of these some, they would make a really cute diaper clutch.  Great gift idea for any new Mom!

I could really go on and on - the possibilities are endless!

Saturday, January 1, 2011

I spent the day today hanging out at my parents house watching football (Roll Tide!), keeping up with kids and I even had a chance to cut out some fabric for my next project.

I got back to my house and found some time to start stitching some of the pieces together and realized that I screwed up.  Yup... lesson learned - always have the instructions pulled up before you start ironing interfacing to your fabric pieces.  Yeah... I'm going to have to re-cut several pieces.  Oops.

Curious about what I'm working on??


I found this cute Gathered Clutch Tutorial at Noodlehead  about a month or so ago and knew that I just had to make one (or some).  I think these would make super cute gifts.  After I make this first one and see how it goes, I'm thinking I'll stitch up some more to stash away for gifts throughout the year.

I'll report back tomorrow with news on how it goes :)

Sunday, November 14, 2010

Houndstooth Clutch

Ok, so it doesn't have to be houndstooth - but mine is :)

How cute is this?


I made it using a freebie pattern that I found at ithinksew.com.  I figured, it be a really cute, quick something to make and there are endless possibilities of what you could to do customize this little clutch.  I decided it was best to start with the pattern as written, then for future ones then I could do something a little different.

The pattern is for beginners, but there do seem to be some instructions that are implied.  Pay attention to what you are doing and think twice before you stitch - otherwise, you'll end up ripping seams (like me).

This is the second pattern of theirs I have tried (... more about the first one later).  I found a pattern that I really like for a new purse too.  Their patterns are really adorable!!

Things I did differently, or noticed for next time...
I didn't have a magnetic closure, but I did have velcro... so I used velcro - which was iron on, so no extra stitching :)

There is a pattern piece for a handle - this is optional, mine obviously didn't have it.  The instructions for adding this handle are at the very end of the instructions pages, so I had actually cut out a piece and still have it left over for next time (guess I'm making another houndstooth one :)).  So if you want the handle, check the instructions at the end of the packet before you begin.

When you add the lining and the exterior together, it simply says to put the right sides together (which is correct... but it doesn't exactly tell you that you should fold the flap piece into the inside of the bag before you add the lining.  So, make sure you fold it in before you stitch the lining in place otherwise, you'll end up with a bag with the flap hidden somewhere inside the lining.

And I'm not really sure how this happened... but my lining is a bit baggy and too big for the inside of my bag (the lining is bigger than the exterior).  Not sure what happened, because I really did follow instructions and used the right size seam allowances.

Anyone else want to try and make one?  I'd love to see pictures!
Related Posts Plugin for WordPress, Blogger...