Showing posts with label holiday. Show all posts

Sunday, January 30, 2011

Valentines PJ Pants

Valentine's Day Pajama Pants

I've been wanting to make some pajama pants for the girls for awhile now.  I had big plans to make some for Christmas but ran out of time... so Valentine's Day PJ's it is!

I stopped at the fabric store on my way home from work one evening and unfortunately there were some major slim pickings when it came to the Valentines holiday fabric.  Fortunately... I found ONE that I liked.  I was really hoping for two that coordinated but that wasn't happening... so this time I just had to make both pairs the exact same.

I'm not too big into making the girls stuff that matches exactly.  It's pretty rare that I dress them the same... although I do like when they coordinate :)


IMG_2079-web

Anyway, here's the fabric that I came home with... the madras plaid is for a future project (I'm not 100% sure what it will be just yet... but I'm making something with it :))

I spent one evening washing and pressing the fabric to have it prepped to start working with. I also traced my pattern on to a large sheet of paper. Why? Well... the pattern I used had sizes 1/2 to 4... my kids wear the size 1 and I figure I'll make plenty of these pants over the years. No need to waste my pattern and cut the thin little pattern paper. If you trace the pattern to a more sturdy sheet of paper then you can re-use it over and over.

IMG_2098-web

Oh yeah, the pattern... if you are curious, I used this Simplicity 2734. It says "It's So Easy" and it really is... These were super simple to make... just as I had hoped!
IMG_2092-web

I began by cutting my pieces out then sewing the inner leg seams together.
IMG_2103-web

Then I slid one leg inside the other and stitched the crotch pieces together.
IMG_2104-web

That's it... there are only 2 real seams on these pants! How simple is that?
IMG_2106-web

All that is left now is to put in the waistband and then hem the pants. Sorry... no pics of that - it's pretty boring and basic, you understand :)

And here they are!
IMG_2121-web

I added a little tab of felt ribbon on the back side as a little detail and to also let me know which side was the back.
IMG_2125-web

That's it! Cute huh? My little model was a bit too busy to be bothered by Mom wanting to take her picture... her eyes glued to Toy Story, of course :)
IMG_2129-web

I actually made it through a project without any major issues... only one visible flaw too... have you seen it yet?

How about now?
IMG_2139-web

Oh well... this was the result of my fabric being folded weird when I cut the pattern pieces out. I say it just adds a bit of character :) hehe


Linked up today's post to:
handmade projects
Bubbly Nature

Tuesday, January 25, 2011

Valentine Wreath

I finally got around to making my new wreath for my door... and taking down the Christmas one!

Valentine Wreath

I've been planning this for awhile, but finally was able to get it all finished.

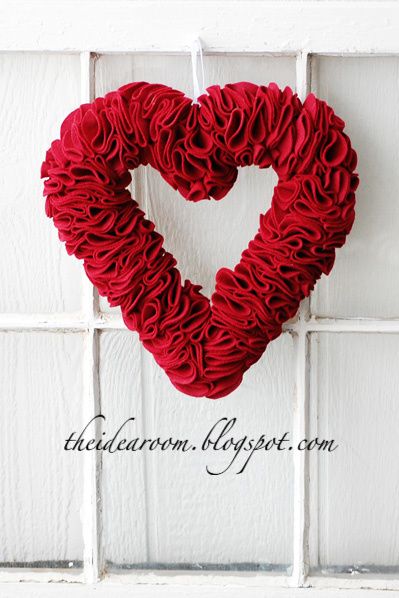
I had seen tons of great wreaths that I had liked and wanted to make. And then decided to get the supplies for this beauty that I found at The Idea Room.


I made a trip to Hobby Lobby on a lunch break and wasn't too wild about the size of the heart shaped wreath forms that they had. I wanted a bigger one. So I settled on a round wreath form instead. I started cutting my felt circles, and then stopped there. Why? Well, I still wanted the heart shaped wreath. No one else in town had any forms so I abandoned the idea and started looking for new ideas.

My friend Desiree over at Chic Inspirations had decided to make the heart wreath with a little different twist to use on the doors at the church for her wedding... they turned out really cute.

I came across one like this. This isn't the original site I found the idea on... but I can't locate it anymore right now - same concept though. When I saw the yarn wrapped wreath I thought that I might be able to make it neutral, and then just be able to change out the embellishments for different seasons/holidays. Always a good thing when you are short on storage space, right?

So, I had some neutral yarn and wrapped it around my styrofoam wreath form. There were some odd spots where it didn't wrap just right, so I figured I'd use those spots as a place to wrap my ribbon door hanger, and the place to add my embellishments.

I found a pick of glittered hearts at Hobby Lobby that I thought would be perfect! So, I just gut them off the pick with wire cutters, and used my new toy to glue them to the wreath. :)

My new toy is this awesome bad boy right here...

awesome Dremel glue gun
it's a Dremel Hot Glue Gun and has interchangeable tips for more precise gluing (without all the excess glue everywhere that just isn't pretty). It's got different temperature settings and a neat little stand built in. Yep, pretty awesome.

Oh, and you can see my Silhouette in the background that I dug out of storage from the garage.  I've had it about 2 years now, but haven't really done much with it.  I've seen tons of awesome projects lately using it, so I dug it back out and will be playing with it soon... so check back to see what I do!


Sunday, October 31, 2010

So Cute It's Scary - Quick Shirt-Redo

Happy Halloween!!

This morning as I went to get the kids dressed, I realized that they didn't really have anything "Halloween-ish" to wear today.  All I had was this cute little outfit that I bought last year...

it was in a 9 month size and the top wasn't going to fit either of the girls this year.  So... I came up with a brilliant idea... I'd use the embroidered part of the shirt and put it on a shirt that does fit!

(I'll warn you now, I forgot to take photos of most everything... sorry.  I'll be better at that next time.)

After searching through the closet to come up with a shirt that we could use, I found a white turtleneck onesie.  The onesie still fit width-wise but my oldest was still too tall for it to be worn as a onesie.

I simply cut off the bottom snap part of the shirt in a straight line right above the leg opening - allowing the shirt to be as long as possible.

Still the shirt was now going to be a little too short, so I took out some of my scrap Halloween themed fabric that I had and cut two pieces to make a new bottom piece for the shirt.  I simply laid the shirt hem (or non-hem at this point, but where the hem would go) over the fabric to determine the width I would need, then cut it a little bit wider - wide enough to make the correct width once I stitched the sides together.

Then I stitched the sides together and ironed the bottom of the themed fabric up to make a hem, and pressed out the seams that I just sewed up too.

Come back to the sewing machine and hem the bottom of your fabric.  You should now have a band of themed fabric - one side hemmed, the other not.  Turn this band inside-out (so you see the wrong side).

With your shirt right-side out slide the hem on over the bottom of the shirt - the right sides of the fabric will be together and the un-stitched sides will be together.  Pin the fabrics together, and stitch with at least a 1/4 in seam (depending on your preference).  Press out the seam.

You now have a cute little band added to your re-purposed onesie. :)

Now, carefully cut the embroidered design off of the non-fitting shirt to the dimensions that you want it.  You can cut right around the design, or in a square or circle... whatever makes most sense.  Lay that piece on top of your themed fabric and cut out the shape in your themed fabric - only slightly bigger - depending on how much of the themed fabric you'd like to see.

I pinked my edges to keep them from fraying too badly, and so that I wouldn't have to be too careful about the stitching I did around the edges.

Pin your design onto your new shirt where you'd like it, and stitch in place.  I stitched the embroidered design piece on the themed fabric first, then stitched the whole thing on my shirt.  You can do it either way.  Even try some decorative stitches if you feel like it :)

And here is what you end up with...
Ta-Da!  Isn't that just adorable?  Not too bad for a super quick, last-minute holiday shirt, huh?  Seriously, this took me maybe 30 minutes to do - and that's with kids running around under my feet while I was working on it.

It looks even cuter on! :)  Don't you think?

So what happened with those cute little pants from the original set? Well, it seems that my youngest daughter is just a little short... so she can still fit in those pants just fine. She's wearing them with a little black turtleneck and couldn't be cuter! :)
Related Posts Plugin for WordPress, Blogger...